Raw Code

Biological Pollutants in the Home

Outdoor air pollution in cities is a major health problem. Much effort and money continue to be spent cleaning up pollution in the outdoor air. But air pollution can be a problem where you least expect it, in the place you may have thought was safest — your home. Many ordinary activities, such as cooking, heating, cooling, cleaning, and redecorating, can cause the release and spread of indoor pollutants at home. Studies have shown that the air in our homes can be even more polluted than outdoor air. Many Americans spend up to 90% of their time indoors, often at home. Therefore, breathing clean indoor air can have an important impact on health. People who are inside a great deal may be at greater risk of developing health problems or having problems made worse by indoor air pollutants. These people include infants, young children, the elderly, and those with chronic illnesses. Many factors determine whether pollutants in your home will affect your health. They include the presence, use, and condition of pollutant sources, the level of pollutants both indoors and out, the amount of ventilation in your home, and your overall health.
What are Biological Pollutants?
Biological pollutants are or were living organisms. They promote poor indoor air quality and maybe a major cause of days lost from work and school, and of doctor and hospital visits. Some can even damage surfaces inside and outside your house. Biological pollutants can travel through the air and are often invisible. Some common indoor biological pollutants are:
  • animal dander (minute scales from hair, feathers, or skin);
  • dust mite and cockroach parts;
  • infectious agents (bacteria and viruses); and
  • pollen.
Some of these substances are in every home. It is impossible to get rid of them all. Even a spotless home may permit the growth of biological pollutants. Two conditions are essential to support biological growth:  nutrients and moisture. These conditions can be found in many locations, such as bathrooms, damp or flooded basements, wet appliances (such as humidifiers and air conditioners), and even some carpets and furniture. Modern materials and construction techniques may reduce the amount of outside air brought into buildings, which may result in high moisture levels inside. Using humidifiers, unvented heaters, and air conditioners in our homes have increased the chances of moisture forming on interior surfaces. This encourages the growth of certain biological pollutants.
The Scope of the Problem
 
Most information about sources and health effects of biological pollutants is based on studies of large office buildings and surveys of homes in the northern U.S. and Canada. These surveys show that 30% to 50% of all structures have damp conditions which may encourage the growth and buildup of biological pollutants. This percentage is likely to be higher in warm, moist climates. Some diseases and illnesses have been linked with biological pollutants in the indoor environment. However, many of them also have causes unrelated to the indoor environment. Therefore, we do not know how many health problems relate only to poor indoor air.
Health Effects of Biological Pollutants
All of us are exposed to biological pollutants. However, the effects on our health depend on the type and amount of biological pollution and the individual person. Some people do not experience health reactions from certain biological pollutants, while others may experience one or more of the following reactions:
  • allergic;
  • infectious; and/or
  • toxic.
Except for the spread of infections indoors, allergic reactions may be the most common health problem with indoor air quality in homes. They are often connected with animal dander (mostly from cats and dogs), with house dust mites (microscopic animals living in household dust), and with pollen. Allergic reactions can range from mildly uncomfortable to life-threatening, as in a severe asthma attack. Some common signs and symptoms are:
  • watery eyes;
  • runny nose and sneezing;
  • nasal congestion;
  • itching;
  • coughing;
  • wheezing and difficulty breathing;
  • headache; and
  • fatigue.
Health experts are especially concerned about people with asthma. These people have very sensitive airways that can react to various irritants, making breathing difficult. The number of people who have asthma has greatly increased in recent years. The number of people with asthma has gone up by 59% since 1970, to a total of 9.6 million people. Asthma in children under 15 years of age has increased 41% in the same period, to a total of 2.6 million children. The number of deaths from asthma is up by 68% since 1979, to a total of almost 4,400 deaths per year.
Talking to Your Doctor
 
Are you concerned about the effects on your health that may be related to biological pollutants in your home? Before you discuss your concerns with your doctor, you should know the answers to the following questions. This information can help the doctor determine whether your health problems may be related to biological pollution.
  • Does anyone in the family have frequent headaches, fevers, itchy and watery eyes, a stuffy nose, dry throat, or a cough? Does anyone complain of feeling tired or dizzy all the time? Is anyone wheezing or having difficulties breathing on a regular basis?
  • Did these symptoms appear after you moved into a new or different home?
  • Do the symptoms disappear when you go to school or the office or go away on a trip, and return when you come back?
  • Have you recently remodeled your home or done any energy-conservation work, such as installing insulation, storm windows, or weather stripping? Did your symptoms occur during or after these activities?
  • Does your home feel humid? Can you see moisture on the windows or on other surfaces, such as walls and ceilings?
  • What is the usual temperature in your home? Is it very hot or cold?
  • Have you recently had water damage?
  • Is your basement wet or damp?
  • Is there any obvious mold or mildew?
  • Does any part of your home have a musty or moldy odor?
  • Is the air stale?
  • Do you have pets?
  • Do your house plants show signs of mold?
  • Do you have air conditioners or humidifiers that have not been properly cleaned?
  • Does your home have cockroaches or rodents?

Infectious diseases caused by bacteria and viruses, such as the flu, measles, chickenpox, and tuberculosis, may be spread indoors. Most infectious diseases pass from person to person through physical contact. Crowded conditions with poor air circulation can promote this spread. Some bacteria and viruses thrive in buildings and circulate through indoor ventilation systems. For example, the bacterium causing Legionnaire’s Disease, a serious and sometimes lethal infection, and Pontiac Fever, a flu-like illness, have circulated in some large buildings.

Toxic reactions are the least studied or understood health problem caused by some biological air pollutants in the home. Toxins can damage a variety of organs and tissues in the body, including the liver, the central nervous system, the digestive tract, and the immune system.
Checking Your Home
 
There is no simple or cheap way to sample the air in your home to determine the level of all biological pollutants. Experts suggest that sampling for biological pollutants is not a useful problem-solving tool. Even if you had your home tested, it is almost impossible to know which biological pollutant(s) cause various symptoms or health problems. The amount of most biological substances required to cause disease is unknown and varies from one person to the next. Does this make the problem sound hopeless? On the contrary, you can take several simple, practical actions to help remove sources of biological pollutants, to help get rid of pollutants, and to prevent their return.
Self-Inspection: A Walk Through Your Home
 
Begin by touring your household. Follow your nose, and use your eyes. Two major factors help create conditions for biological pollutants to grow:  nutrients and constant moisture with poor air circulation.
  1. Dust and construction materials, such as wood, wallboard, and insulation, contain nutrients that allow biological pollutants to grow. Firewood also is a source of moisture, fungi, and bugs.
  2. Appliances, such as humidifiers, kerosene and gas heaters, washers and clothes dryers, dishwashers, and gas stoves, add moisture to the air.
A musty odor, moisture on hard surfaces, and even water stains may be caused by:
  • air-conditioning units;
  • basements, attics, and crawlspaces;
  • bathrooms;
  • carpets;
  • heating and air-conditioning ducts;
  • humidifiers and dehumidifiers; and
  • refrigerator drip pans.

What You Can Do About Biological Pollutants

 
Before you give away the family pet or move, there are less drastic steps you can take to reduce potential problems. Properly cleaning and maintaining your home can help reduce the problem and may avoid interrupting your normal routine. People who have health problems, such as asthma, or who are allergic, may need to do this and more. Discuss this with your doctor.

Roofing

Roofs play a key role in protecting building occupants and interiors from outside weather conditions, primarily moisture. The roof, insulation, and ventilation must all work together to keep the building free of moisture. Roofs also protect from the sun. In fact, if designed correctly, roof overhangs can protect the building’s exterior walls from moisture and sun. The concerns regarding moisture, standing water, durability, and appearance are different, reflected in the choices of roofing materials.

 
Maintaining Your Roof
Homeowner maintenance includes cleaning the leaves and debris from the roof’s valleys and gutters. Debris in the valleys can cause water to wick under the shingles and cause damage to the interior of the roof. Clogged rain gutters can cause water to flow back under the shingles on the eaves and cause damage, regardless of the roofing material. including composition shingle, wood shake, tile, or metal. The best way to preserve your roof is to stay off it. Also, seasonal changes in the weather are usually the most destructive forces.
A leaky roof can damage ceilings, walls, and furnishings. To protect buildings and their contents from water damage, roofers repair and install roofs made of tar or asphalt and gravel; rubber or thermoplastic; metal; or shingles made of asphalt, slate, fiberglass, wood, tile, or other material. Roofers also may waterproof foundation walls and floors.
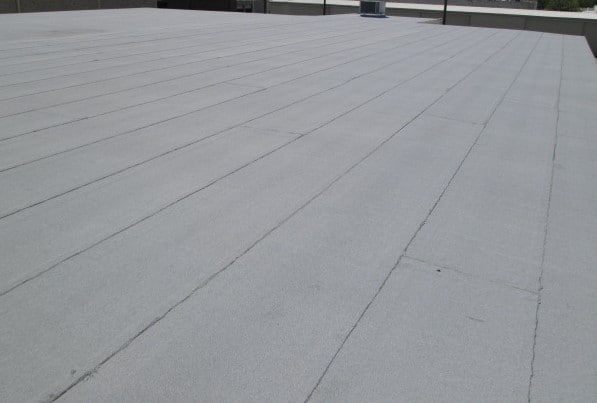
There are two types of roofs:  flat and pitched (sloped). Most commercial, industrial and apartment buildings have flat or slightly sloping roofs. Most houses have pitched roofs. Some roofers work on both types; others specialize. Most flat roofs are covered with several layers of materials. Roofers first put a layer of insulation on the roof deck. Over the insulation, they then spread a coat of molten bitumen, a tar-like substance. Next, they install partially overlapping layers of roofing felt, a fabric saturated in bitumen, over the surface. Roofers use a mop to spread hot bitumen over the surface and under the next layer. This seals the seams and makes the surface watertight. Roofers repeat these steps to build up the desired number of layers, called plies. The top layer either is glazed to make a smooth finish or has gravel embedded in the hot bitumen to create a rough surface. An increasing number of flat roofs are covered with a single-ply membrane of waterproof rubber or thermoplastic compounds. Roofers roll these sheets over the roof’s insulation and seal the seams. Adhesive mechanical fasteners or stone ballast hold the sheets in place. The building must be of sufficient strength to hold the ballast.
Most residential roofs are covered with shingles. To apply shingles, roofers first lay, cut, and tack 3-foot strips of roofing felt lengthwise over the entire roof. Then, starting from the bottom edge, they staple or nail overlapping rows of shingles to the roof. Workers measure and cut the felt and shingles to fit intersecting roof surfaces and to fit around vent pipes and chimneys. Wherever two roof surfaces intersect, or where shingles reach a vent pipe or chimney, roofers cement or nail flashing strips of metal or shingle over the joints to make them watertight. Finally, roofers cover exposed nailheads with roofing cement or caulking to prevent water leakage. Roofers who use tile, metal shingles, or shakes follow a similar process. Some roofers are also water-proof and damp-proof masonry and concrete walls and floors. To prepare surfaces for waterproofing, they hammer and chisel away rough spots, or remove them with a rubbing brick, before applying a coat of liquid waterproofing compound. They also may paint or spray surfaces with a waterproofing material, or attach a waterproofing membrane to surfaces. When damp-proofing, they usually spray a bitumen-based coating on interior or exterior surfaces.
Several roofing materials are available…
 

Asphalt


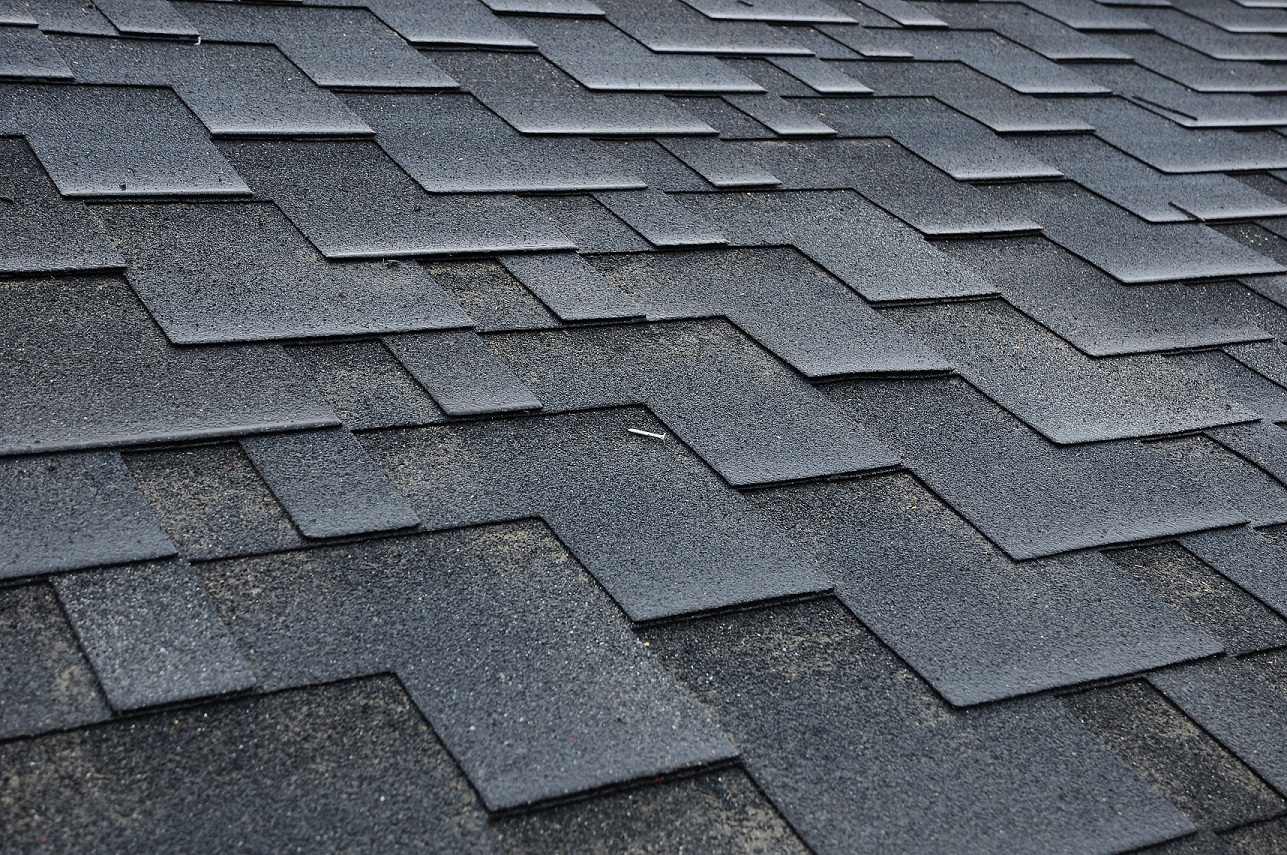
Asphalt is the most commonly used roofing material. Asphalt products include shingles, roll roofing, built-up roofing, and modified bitumen membranes. Asphalt shingles are typically the most common and economical choice for residential roofing. They come in a variety of colors, shapes, and textures. There are four different types: strip, laminated, interlocking, and large individual shingles. Laminated shingles consist of more than one layer of tabs to provide extra thickness. Interlocking shingles are used to provide greater wind resistance. And large individual shingles generally come in rectangular and hexagonal shapes. Roll-roofing products are generally used in residential applications, mostly for underlayments and flashings. They come in four different types of material: smooth-surfaced, saturated felt, specialty-eaves flashings, and mineral-surfaced. Only mineral-surfaced is used alone as a primary roof covering for small buildings, such as sheds. Smooth-surfaced products are used primarily as flashing to seal the roof at intersections and protrusions, and for providing extra deck protection at the roof’s eaves and valleys. Saturated felt is used as an underlayment between the roof deck and the roofing material. Specialty-eaves flashings are typically used in climates where ice dams and water backups are common. Built-up roofing (or BUR) is the most popular choice of roofing used on commercial, industrial and institutional buildings. BUR is used on flat and low-sloped roofs and consists of multiple layers of bitumen and ply sheets. Components of a BUR system include the roof deck, a vapor retarder, insulation, membrane, and surfacing material. A modified bitumen-membrane assembly consists of continuous plies of saturated felts, coated felts, fabrics, or mats between which alternate layers of bitumen are applied, either surfaced or unsurfaced. Factory surfacing, if applied, includes mineral granules, slag, aluminum, or copper. The bitumen determines the membrane’s physical characteristics and provides primary waterproofing protection, while the reinforcement adds strength, puncture resistance, and overall system integrity.

Metal

Most metal roofing products consist of steel or aluminum, although some consist of copper and other metals. Steel is invariably galvanized by the application of a zinc or a zinc-aluminum coating, which greatly reduces the rate of corrosion. Metal roofing is available as traditional seam and batten, tiles, shingles, and shakes. Products also come in a variety of styles and colors. Metal roofs with solid sheathing control noise from rain, hail, and bad weather just as well as any other roofing material. Metal roofing can also help eliminate ice damming at the eaves. And in wildfire-prone areas, metal roofing helps protect buildings from fire, should burning embers land on the roof. Metal roofing costs more than asphalt, but it typically lasts two to three times longer than asphalt and wood shingles.

Wood

Wood shakes offer a natural look with a lot of character. Because of variations in color, width, thickness, and cut of the wood, no two shake roofs will ever look the same. Wood offers some energy benefits, too. It helps to insulate the attic, and it allows the house to breathe, circulating air through the small openings under the felt rows on which wooden shingles are laid. A wood shake roof, however, demands proper maintenance and repair, or it will not last as long as other products. Mold, rot, and insects can become a problem. The life-cycle cost of a shake roof may be high, and old shakes can’t be recycled. Most wood shakes are unrated by fire safety codes. Many use wipe or spray-on fire retardants, which offer less protection and are only effective for a few years. Some pressure-treated shakes are impregnated with fire retardants and meet national fire safety standards. Installing wood shakes is more complicated than roofing with composite shingles, and the quality of the finished roof depends on the experience of the contractor, as well as the caliber of the shakes used. The best shakes come from the heartwood of large, old cedar trees, which are difficult to find. Some contractors maintain that shakes made from the outer wood of smaller cedars, the usual source today, are less uniform, more subject to twisting and warping, and don’t last as long.

Concrete and Tile

Concrete tiles are made of extruded concrete that is colored. Traditional roofing tiles are made from clay. Concrete and clay tile roofing systems are durable, aesthetically appealing, and low in maintenance. They also provide energy savings and are environmentally friendly. Although material and installation costs are higher for concrete and clay tile roofs, when evaluated on a price-versus-performance basis, they may out-perform other roofing materials. Tile adorns the roofs of many historic buildings, as well as modern structures. In fact, because of its extreme durability, longevity, and safety, roof tile is the most prevalent roofing material in the world. Tested over centuries, roof tile can successfully withstand the most extreme weather conditions including hail, high wind, earthquakes, scorching heat, and harsh freeze-thaw cycles. Concrete and clay roof tiles also have unconditional Class A fire ratings, which means that, when installed according to building code, roof tile is non-combustible and maintains that quality throughout its lifetime. In recent years, manufacturers have developed new water-shedding techniques and, for high-wind situations, new adhesives and mechanical fasteners. Because the ultimate longevity of a tile roof also depends on the quality of the sub-roof, roof tile manufacturers are also working to improve flashings and other aspects of the underlayment system. Under normal circumstances, properly installed tile roofs are virtually maintenance-free. Unlike other roofing materials, roof tiles actually become stronger over time. Because of roof tile’s superior quality and minimal maintenance requirements, most roof tile manufacturers offer warranties that range from 50 years to the lifetime of the structure.

Concrete and clay tile roofing systems are also energy-efficient, helping to maintain livable interior temperatures (in both cold and warm climates) at a lower cost than other roofing systems. Because of the thermal capacity of roof tiles and the ventilated air space that their placement on the roof surface creates, a tile roof can lower air-conditioning costs in hotter climates, and produce more constant temperatures in colder regions, which reduces potential ice accumulation. Tile roofing systems are made from naturally occurring materials and can be easily recycled into new tiles or other useful products. They are produced without the use of chemical preservatives and do not deplete limited natural resources.

Single-Ply


Single-ply membranes are flexible sheets of compounded synthetic materials that are manufactured in a factory. There are three types of membranes: thermosets, thermoplastics, and modified bitumens. These materials provide strength, flexibility, and long-lasting durability. The advantages of pre-fabricated sheets are the consistency of the product quality, the versatility in their attachment methods, and, therefore, their broader applicability. They are inherently flexible, used in a variety of attachment systems, and compounded for long-lasting durability and watertight integrity for years of roof life. Thermoset membranes are compounded from rubber polymers. The most commonly used polymer is EPDM (often referred to as “rubber roofing”). Thermoset membranes make successful roofing materials because they can withstand the potentially damaging effects of sunlight and the most common chemicals generally found on roofs. The easiest way to identify a thermoset membrane is by its seams, which require the use of adhesive, either liquid or tape, to form a watertight seal at the overlaps. Thermoplastic membranes are based on plastic polymers. The most common thermoplastic is PVC (polyvinyl chloride) which has been made flexible through the inclusion of certain ingredients called plasticizers. Thermoplastic membranes are identified by seams that are formed using either heat or chemical welding. These seams are as strong or stronger than the membrane itself. Most thermoplastic membranes are manufactured to include a reinforcement layer, usually polyester or fiberglass, which provides increased strength and dimensional stability. Modified bitumen membranes are hybrids that incorporate the high-tech formulation and prefabrication advantages of single-ply with some of the traditional installation techniques used in built-up roofing. These materials are factory-fabricated layers of asphalt, “modified” using a rubber or plastic ingredient for increased flexibility, and combined with reinforcement for added strength and stability. There are two primary modifiers used today: APP (atactic polypropylene) and SBS (styrene butadiene styrene). The type of modifier used may determine the method of sheet installation. Some are mopped down using hot asphalt, and some use torches to melt the asphalt so that it flows onto the substrate. The seams are sealed by the same technique.

Are You at Risk?

 
If you aren’t sure whether your house is at risk from natural disasters, check with your local fire marshal, building official, city engineer, or planning and zoning administrator. They can tell you whether you are in a hazardous area. Also, they usually can tell you how to protect yourself and your house and property from damage. It is never a bad idea to ask an InterNACHI inspector whether your roof requires repair during your next scheduled inspection. Protection can involve a variety of changes to your house and property which that can vary in complexity and cost. You may be able to make some types of changes yourself. But complicated or large-scale changes and those that affect the structure of your house or its electrical wiring and plumbing should be carried out only by a professional contractor licensed to work in your state, county, or city. One example is fire protection, accomplished by replacing flammable roofing materials with fire-resistant materials. This is something that most homeowners would probably hire a contractor to do.

Replacing Your Roof

The age of your roof is usually the major factor in determining when to replace it. Most roofs last many years if properly installed, and often can be repaired rather than replaced. An isolated leak usually can be repaired. The average life expectancy of a typical residential roof is 15 to 20 years. Water damage to a home’s interior or overhangs is commonly caused by leaks from a single weathered portion of the roof, poorly installed flashing, or from around chimneys and skylights. These problems do not necessarily mean you need a new roof.

Fire-Resistant Materials

 
Some roofing materials, including asphalt shingles, and especially wood shakes, are less resistant to fire than others. When wildfires and brush fires spread to houses, it is often because burning branches, leaves, and other debris buoyed by the heated air and carried by the wind fall onto roofs. If the roof of your house is covered with wood or asphalt shingles, you should consider replacing them with fire-resistant materials. You can replace your existing roofing materials with slate, terra cotta, or other types of tile, or standing-seam metal roofing. Replacing roofing materials is difficult and dangerous work. Unless you are skilled in roofing and have all the necessary tools and equipment, you will probably want to hire a roofing contractor to do the work. Also, a roofing contractor can advise you on the relative advantages and disadvantages of various fire-resistant roofing materials.


Hiring a Licensed Contractor
One of the best ways to select a roofing contractor is to ask friends and relatives for recommendations. You may also contact a professional roofers association for referrals. Professional associations have stringent guidelines for their members to follow. The roofers association in your area will provide you with a list of available contractors. Follow these guidelines when selecting a contractor:
  • get three references and review their past work;
  • get at least three bids;
  • get a written contract, and don’t sign anything until you completely understand the terms;
  • pay 10% down or $1,000 whichever is less;
  • don’t let payments get ahead of the work;
  • don’t pay cash;
  • don’t make final payment until you’re satisfied with the job; and
  • don’t rush into repairs or be pressured into making an immediate decision.
You’ve Chosen the Contractor… What About the Contract?
 
Make sure everything is in writing. The contract is one of the best ways to prevent problems before you begin. The contract protects you and the contractor by including everything you have both agreed upon. Get all promises in writing and spell out exactly what the contractor will and will not do.
…and Permits?
 
Your contract should call for all work to be performed following all applicable building codes. The building codes set minimum safety standards for construction. Generally, a building permit is required whenever structural work is involved. The contractor should obtain all necessary building permits. If this is not specified in the contract, you may be held legally responsible for failure to obtain the required permits. The building department will inspect your roof when the project has reached a certain stage, and again when the roof is completed.
and Insurance?
 
Make sure the contractor carries workers’ compensation insurance and general liability insurance in case of accidents on the job. Ask to have copies of these policies for your job file. You should protect yourself from mechanics’ liens against your home in the event the contractor does not pay subcontractors or material suppliers. You may be able to protect yourself by having a “release of lien” clause in your contract. A release of lien clause requires the contractor, subcontractors, and suppliers to furnish a “certificate of waiver of lien.” If you are financing your project, the bank or lending institution may require that the contractor, subcontractors, and suppliers verify that they have been paid before releasing funds for subsequent phases of the project.
Keep these points in mind if you plan to have your existing roofing materials replaced:
  • Tile, metal, and slate are more expensive roofing materials, but if you need to replace your roofing anyway, it may be worthwhile to pay a little more for the added protection these materials provide.
  • Slate and tile can be much heavier than asphalt shingles or wood shingles. If you are considering switching to one of these heavier coverings, your roofing contractor should determine whether the framing of your roof is strong enough to support them.
  • If you live in an area where snow loads are a problem, consider switching to a modern standing-seam metal roof, which will usually shed snow efficiently.

Home Repair Rip-Offs

Homeowners have more to worry about than home repair rip-offs by shady contractors in this lagging economy, but such a climate brings desperation — and with it, sadly, fraud. Of course, the majority of tradesmen are generally honest professionals, but there is a large number of unscrupulous contractors who will fix items that don’t need fixing or grossly overcharge you for services or parts. Worse, there are plenty of con artists posing as tradesmen who will simply take your money and run. Inspectors are often the first to uncover such fraud, so they too need to be familiar with its common forms to best serve their clients. 

Yes, this fortress was made by thousands of termites, but it is not evidence that any of them have entered your house.

Some common home repair scams include:

  • roof work. Con artists are known to travel from state to state following natural disasters and looking for victims of storms. Beware of people who suddenly arrive in your neighborhood, offering to fix your roof at a discount. Also, don’t trust a roofer who assesses a leaky roof from the ground without examining it. The flashing is often all that needs to be replaced, even when the tradesman tries to convince you that you need a whole new roof.
  • driveway sealers.  This time-honored grift has tradesmen pulling up to your home in his truck and offering to re-seal your driveway using leftover “sealant” from a job “just down the block.”  The low price is unbelievable, and so is the job.  Generally, the sealant is paint or some other cheap, black spray media that will quickly wash away with the next rain.
  • termites. Myths that exaggerate the dangers of termites abound, and homeowners can be easily duped into unnecessary treatment. Ask for prices from more than one company and compare their services. Make sure to get a guarantee that covers you in case termites to return within a given period of time. Read the guarantee and the rest of the contract carefully before you sign! Be on guard for the following ruses:
    • The exterminator shows you termites on a fence or woodpile that is not connected to your house. If he were competent and honest, he would know that these termites pose no threat to your home.
    • He (but not you) witnesses “evidence.” Make the exterminator show you the alleged evidence of the infestation. Termite-damaged wood is hollowed out along the grain, with bits of soil or mud lining the galleries.
    • He offers a free termite inspection, and his motives are questionable, to begin with. He may bring the evidence to your house with him.
  • chimney sweeps. Beware of any chimney sweep who arrives at your door unannounced, offering to perform his services for a low price. He might say that he’s just worked on your neighbor’s chimney, and offer you a suspiciously low price for a sweep. The inspection will uncover “problems” that quickly balloon the price.
  • HVAC specialists. The most common HVAC rip-offs are replacing parts that work fine and substituting used parts for new ones. If you get suspicious, ask to see the alleged broken parts before they’re replaced, and look at the packaging and documentation for the new parts before they’re installed. If possible, have HVAC work performed in the off-season, as it may be significantly cheaper.
  • plumbers. Parts cost plumbers only a tiny fraction of the total charge for their services, but some plumbers will still cut corners to boost their profit. They may use plastic or low-grade metal, for instance, or 1/2-inch pipe instead of the 3/4-inch pipe. Ask what they are installing and how long the parts will last.
  • painters. Some painters agree to use a specific brand of high-quality paint, then pour cheap paint into name-brand cans. Most of the cans the painter brings with him should be sealed when the job is started. If not, ask why. Other painters skimp on the prep work.

Homeowners should heed the following advice whenever they hire a contractor:

  • Go to www.nxtmoveinspection.com to schedule an inspection. We will stop by and make sure your construction project is done right.
  • If you call a contractor for an estimate and live in an affluent neighborhood, don’t mention your address or phone number until you get the estimate. You can even call a tradesman in a less wealthy town or neighborhood that’s nearby, as their price will likely be lower than the going rate in your area.
  • Try to negotiate a flat rate if the tradesman has no idea how much the job is going to cost. This is especially helpful in plumbing work, as almost all pipes are hidden behind walls and the job can easily become more complicated than originally planned.
  • Ask if the tradesman charges for travel time. If he does, it may be cheaper to choose someone closer. Also, ask if he charges for time spent traveling to supply stores.
  • Know your contractor. Be sure he is licensed, and get a written agreement stating the cost and the work to be performed.
  • Beware of any contractor who shows up at your door unannounced or calls you on the phone. Con artists must move every so often to frustrate law enforcement, so they have no fixed address and rely on door-to-door or phone solicitation. For the same reason, their invoices may contain only a P.O. box rather than a street address.
  • Always be wary of a contractor who recommends a particular company or individual after “discovering” a problem, as he will probably receive a kickback for the referral, so you cannot trust his advice.
  • Beware of a contractor who tries to unnecessarily increase the scope of a project. Also known as an upseller, these people will do the following:
    • not offer you a range of options, including cheaper alternatives or work that is different than what you had anticipated; or
    • use scare tactics to persuade you to take his recommendations.
  • Beware of contractors who insist that they are charging you only for what they paid for the materials, if they are, in fact, making a profit on the materials. Material over-charging is unethical if the contractor lies about it.
  • Beware of material-swapping, in which the contractor will buy premium products and make you reimburse him, but then he returns the product for something cheaper and of lower quality and pockets the difference. If you suspect material-swapping, you can uncover the farce at the end of the job by comparing the packaging with the products listed on the receipt.
  • Do not give a large down payment. It may be appropriate to pay a small percentage of the total estimate up front, but if the contractor asks for most (or all) of the money upfront, he may be a con artist. Even if he does return to perform the work, he may botch the job or leave it unfinished, leaving you with little power to contest. And, of course, never pay in cash.
  • If you are elderly, be on heightened alert for scammers because you will be targeted more often than your children.
    In summary, homeowners and inspectors alike should be wise to the plethora of ways that home repair contractors, or those posing as such, rip off their clients.

Estimating the Lifespan of a Water Heater

While the typical water heater has a lifespan of about 10 years, careful consideration of the factors that pertain to its lifespan can provide the InterNACHI home inspector and the homeowner with information about the potential costs that would be incurred by replacing the water heater. These factors include correct installation; usage volume; construction quality; and maintenance.

Correct Installation

Water heaters should be installed upright in well-ventilated areas — not just for fire safety requirements and carbon monoxide buildup, but also because poor ventilation can shorten the lifespan of the water heater. 

A water heater should not be placed in an area susceptible to flood damage. Water can rust out the exterior and pipes, decreasing the life expectancy and efficiency of the unit.  A water heater is best placed in an easily accessible area for maintenance.  It should also be readily visible for fire and health-hazard requirements.

The inspector may wish to inquire as to whether the heater was installed professionally. Homeowners may install their own units to save money, but the installation of a tankless gas water heater, for example, requires more skill than the average DIY task.  In the case of the owner-installed tankless gas water heater, the home inspector may want to check the gas pipework for leaks to determine whether there is adequate ventilation.

Usage

The life expectancy of the water heater depends a great deal on the volume of water used. Using large quantities of water means that the water heater will have to work harder to heat the water. In addition, the greater the volume of water, the greater the corrosive effect of the water will be.

water heaterConstruction Quality of the Water Heater

As with most household systems and components, you get what you pay for in a heater. Cheaper models will generally have a shorter lifespan, while more expensive models will generally last longer. A good indication of a water heater’s construction quality is its warranty.  Longer warranties naturally imply sounder construction. According to a 2007 Consumer Report that deconstructed 18 different models of water heaters, it was determined that models with longer warranties invariably were of superior manufacturing quality, with nine- and 12-year models typically having larger or higher-wattage heating elements, as well as thicker insulation. Models with larger heating elements have much better resistance to mineral buildup or scum.

Pay attention to the model’s features.  Porcelain casing, for example, provides an additional layer of protection against rusting, and a greater level of heat insulation. Some models come with a self-cleaning feature that flushes the pipes of mineral deposits, which is an important consideration in the unit’s lifespan.  Models with larger or thicker anodes are better-equipped to fight corrosion.


Maintenance and Parts Replacement

The hardness of the water is another consideration when looking at estimating the lifespan of a heater.  In areas where there is a higher mineral content to the water, water heaters have shorter lifespans than in other areas, as mineral buildup reduces the units’ efficiency. Even in areas where the water is softer, however, some mineral deposition is bound to occur.  A way to counteract this mineral buildup is to periodically flush the water heater system, which not only removes some of the buildups but, in tank systems, the process heats the water in the tank. High-end models typically come equipped with a self-flushing feature.  In models for which manual flushing is required, it is important not to damage the water heater valve, which is usually made of plastic and is easy to break.

Although an older model may appear to be well-maintained, a question arises:  Is the maintenance worth it? Warranties often exclude labor costs, so a good rule to follow is that if the total repair cost per year is greater than 10% of the cost of buying and installing a new heater, it is probably not worth replacing damaged parts.

It is debatable whether the cost in time and money of replacing the sacrificial anode in a water heater is worth the benefit of prolonging the use of the existing water heater by a couple of years. In the tricky process of emptying the tank and replacing the anode, it is easy to damage the unit, and, as some warranties can be voided by anode replacement, the cost of future repairs or maintenance that might otherwise be covered must be considered.

In summary, there is a variety of factors influencing the lifespan of a water heater. Beyond the basic telltale signs, such as a leaky puddle under the heater or cold showers in the morning that indicate that a new water heater is probably in order, the homeowner should consider the age and warranty of the model, and carefully weigh the cost-benefit of maintaining an existing heater versus buying a new one.

Ground-Fault Circuit Interrupters (GFCIs) 

What is a GFCI?

A ground-fault circuit interrupter, or GFCI, is a device used in electrical wiring to disconnect a circuit when an unbalanced current is detected between an energized conductor and a neutral return conductor.  Such an imbalance is sometimes caused by current “leaking” through a person who is simultaneously in contact with a ground and an energized part of the circuit, which could result in lethal shock.  GFCIs are designed to protect in such a situation, unlike standard circuit breakers, which guard against overloads, short circuits, and ground faults.
It is estimated that about 300 deaths by electrocution occur every year, so the use of GFCIs has been adopted in new construction, and recommended as an upgrade in older construction, to mitigate the possibility of injury or fatality from electric shock.

History


The first high-sensitivity system for detecting current leaking to the ground was developed by Henri Rubin in 1955 for use in South African mines.  This cold-cathode system had a tripping sensitivity of 250 mA (milliamperes) and was soon followed by an upgraded design that allowed for adjustable trip-sensitivity from 12.5 to 17.5 mA.  The extremely rapid tripping after earth leakage-detection caused the circuit to de-energize before electric shock could drive a person’s heart into ventricular fibrillation, which is usually the specific cause of death attributed to electric shock.

Charles Dalziel first developed a transistorized version of the ground-fault circuit interrupter in 1961.  Through the 1970s, most GFCIs were of the circuit-breaker type.  This version of the GFCI was prone to frequent false trips due to poor alternating-current characteristics of 120-volt insulations.  Especially in circuits with long cable runs, current leaking along the conductors’ insulation could be high enough that breakers tended to trip at the slightest imbalance.
Since the early 1980s, ground-fault circuit interrupters have been built into outlet receptacles, and advances in design in both receptacle and breaker types have improved reliability while reducing instances of “false trips,” known as nuisance-tripping.

NEC Requirements for GFCIs

The National Electrical Code (NEC) has included recommendations and requirements for GFCIs in some form since 1968 when it first allowed for GFCIs as a method of protection for underwater swimming pool lights.  Throughout the 1970s, GFCI installation requirements were gradually added for 120-volt receptacles in areas prone to possible water contact, including bathrooms, garages, and any receptacles located outdoors.

The 1980s saw additional requirements implemented.  During this period, kitchens and basements were added as areas that were required to have GFCIs, as well as boat houses, commercial garages, and indoor pools and spas.  New requirements during the ’90s included crawlspaces, wet bars, and rooftops.  Elevator machine rooms, car tops, and pits were also included at this time.  In 1996, GFCIs were mandated for all temporary wiring for construction, remodeling, maintenance, repair, demolition, and similar activities and, in 1999, the NEC extended GFCI requirements to carnivals, circuses, and fairs.

The 2008 NEC contains additional updates relevant to GFCI use, as well as some exceptions for certain areas.  The 2008 language is presented here for reference.

2008 NEC on GFCIs

100.1 Definition100.1  Definitions. Ground-Fault Circuit Interrupter. A device intended for the protection of personnel that functions to de-energize a circuit or portion thereof within an established period of time when a current to ground exceeds the values established for a Class A device.FPN: Class A ground-fault circuit interrupters trip when the current to ground has a value in the range of 4 mA to 6 mA.  For further information, see UL 943, standard for Ground-Fault Circuit Interrupters.210.8(A)&(B)  Protection for Personnel210.8 Ground-Fault Circuit Interrupter Protection for Personnel.(A)  Dwelling Units. All 125-volt, single-phase, 15- and 20-ampere receptacles installed in the locations specified in (1) through (8) shall have ground-fault circuit-interrupter protection for personnel.

(1)   bathrooms;

(2)   garages, and also accessory buildings that have a floor located at or below grade level not intended as habitable rooms and limited to storage areas, work areas, and areas of similar use;

Exception No. 1: Receptacles not readily accessible.Exception No. 2: A single receptacle or a duplex receptacle for two appliances that, in normal use, is not easily moved from one place to another and that is cord-and-plug connected in accordance with 400.7(A)(6), (A)(7), or (A)(8).Receptacles installed under the exceptions to 210.8(A)(2) shall not be considered as meeting the requirements of 210.52(G)

(3)   outdoors;

Exception: Receptacles that are not readily accessible and are supplied by a dedicated branch circuit for electric snow melting or deicing equipment shall be permitted to be installed in accordance with the applicable provisions of Article 426.

(4)   crawlspaces at or below grade level.

Exception No. 1: Receptacles that are not readily accessible.Exception No. 2:  A single receptacle or a duplex receptacle for two appliances that, in normal use, is not easily moved from one place to another and that is cord-and-plug connected in accordance with 400.7(A)(6), (A)(7), or (A)(8).Exception No. 3: A receptacle supplying only a permanently installed fire alarm or burglar alarm system shall not be required to have ground-fault circuit interrupter protection.Receptacles installed under the exceptions to 210.8(A)(2) shall not be considered as meeting the requirements of 210.52(G)

(6)   kitchens, where the receptacles are installed to serve the countertop surfaces;(7)   wet bar sinks, where the receptacles are installed to serve the countertop surfaces and are located within 6 feet (1.8 m) of the outside edge of the wet bar sink;(8)   boathouses;

(B) Other Than Dwelling Units. All 125-volt, single-phase, 15- and 20-ampere receptacles Installed in the locations specified in (1), (2), and (3) shall have ground-fault circuit interrupter protection for personnel:

(1)   bathrooms;(2)   rooftops;

Exception: Receptacles that are not readily accessible and are supplied by a dedicated branch circuit for electric snow-melting or de-icing equipment shall be permitted to be installed in accordance with the applicable provisions of Article 426.

(3)   kitchens.

Testing Receptacle-Type GFCIs

Receptacle-type GFCIs are currently designed to allow for safe and easy testing that can be performed without any professional or technical knowledge of electricity.  GFCIs should be tested right after installation to make sure they are working properly and protecting the circuit.  They should also be tested once a month to make sure they are working properly and are providing protection from fatal shock.
To test the receptacle GFCI, first, plug a nightlight or lamp into the outlet. The light should be on.  Then press the “TEST” button on the GFCI. The “RESET” button should pop out, and the light should turn off.
If the “RESET” button pops out but the light does not turn off, the GFCI has been improperly wired. Contact an electrician to correct the wiring errors.

If the “RESET” button does not pop out, the GFCI is defective and should be replaced.

If the GFCI is functioning properly and the lamp turns off, press the “RESET” button to restore power to the outlet.

Child-Proofing Your Home: 12 Safety Devices to Protect Your Children

About 2.5 million children are injured or killed by hazards in the home each year. The good news is that many of these incidents can be prevented by using simple child-safety devices on the market today. Any safety device you buy should be sturdy enough to prevent injury to your child, yet easy for you to use. It’s important to follow installation instructions carefully.

In addition, if you have older children in the house, be sure they re-secure safety devices. Remember, too, that no device is completely childproof; determined youngsters have been known to disable them. You can childproof your home for a fraction of what it would cost to have a professional do it. And safety devices are easy to find. You can buy them at hardware stores, baby equipment shops, supermarkets, drug stores, home and linen stores, and through online and mail-order catalogs.
InterNACHI inspectors, too, should know what to tell clients who are concerned about the safety of their children. Here are some child-safety devices that can help prevent many injuries to young children.

1.  Use safety latches and locks for cabinets and drawers in kitchens, bathrooms, and other areas to help prevent poisonings and other injuries. Safety latches and locks on cabinets and drawers can help prevent children from gaining access to medicines and household cleaners, as well as knives and other sharp objects.

Look for safety latches and locks that adults can easily install and use, but that are sturdy enough to withstand pulls and tugs from children. Safety latches are not a guarantee of protection, but they can make it more difficult for children to reach dangerous substances. Even products with child-resistant packaging should be locked away out of reach; this packaging is not childproof.
But, according to Colleen Driscoll, executive director of the International Association for Child Safety (IAFCS), “Installing an ineffective latch on a cabinet is not an answer for helping parents with safety.  It is important to understand parental habits and behavior.  While a latch that loops around cabinet knob covers is not expensive and easy to install, most parents do not consistently re-latch it.”
Parents should be sure to purchase and install safety products that they will actually adapt to and use.
2.  Use safety gates to help prevent falls downstairs and to keep children away from dangerous areas. Look for safety gates that children cannot dislodge easily, but that adults can open and close without difficulty. For the top of stairs, gates that screw into the wall are more secure than “pressure gates.”
New safety gates that meet safety standards display a certification seal from the Juvenile Products Manufacturers Association (JPMA). If you have an older safety gate, be sure it doesn’t have “V” shapes that are large enough for a child’s head and neck to fit into.
3.  Use door locks to help prevent children from entering rooms and other areas with possible dangers, including swimming pools.

To prevent access to swimming pools, door locks on safety gates should be placed high, out of reach of young children. Locks should be used in addition to fences and alarms. Sliding glass doors with locks that must be re-secured after each use are often not an effective barrier to pool access.

Doorknob covers, while inexpensive and recommended by some, are generally not effective for children who are tall enough to reach the doorknob; a child’s ingenuity and persistence can usually trump the cover’s effectiveness.
4.  Use anti-scald devices for faucets and showerheads, and set your water heater temperature to 120° F to help prevent burns from hot water. A plumber may need to install these.

5.  Use smoke detectors on every level of your home and near bedrooms to alert you to fires. Smoke detectors are essential safety devices for protection against fire deaths and injuries. Check smoke detectors once a month to make sure they’re working. If detectors are batt

ery-operated, change batteries at least once a year, or consider using 10-year batteries.

6.  Use window guards and safety netting to help prevent falls from windows, balconies, decks and landings. Window guards and safety netting for balconies and decks can help prevent serious falls.  Check these safety devices frequently to make sure they are secure and properly installed and maintained. There should be no more than 4 inches between the bars of the window guard. If you have window guards, be sure at least one window in each room can be easily used for escape in a fire. Window screens are not effective for preventing children from falling out of windows.
7.  Use corner and edge bumpers to help prevent injuries from falls against sharp edges of furniture and fireplaces. Corner and edge bumpers can be used with furniture and fireplace hearths to help prevent injuries from falls, and to soften falls against sharp and rough edges.
Be sure to look for bumpers that stay securely on furniture and hearth edges.
8.  Use receptacle or outlet covers and plates to help prevent children from electrical shock and possible electrocution.
Be sure the outlet protectors cannot be easily removed by children and are large enough so that children cannot choke on them.
9.  Use a carbon monoxide (CO) detector outside bedrooms to help prevent CO poisoning. Consumers should install CO detectors near sleeping areas in their homes. Households that should use CO detectors include those with gas or oil heat or with attached garages.
10.  Cut window blind cords to help prevent children from strangling in blind-cord loops. Window blind cord safety tassels on mini blinds and tension devices on vertical blinds and drapery cords can help prevent deaths and injuries from strangulation in the loops of cords. Inner cord stops can help prevent strangulation in the inner cords of window blinds.
However, the IAFCS’s Ms. Driscoll states, “Cordless is best.  Although not all families are able to replace all products, it is important that parents understand that any corded blind or window treatment can still be a hazard.  Unfortunately, children are still becoming entrapped in dangerous blind cords despite advances in safety in recent years.”
For older mini blinds, cut the cord loop, remove the buckle, and put safety tassels on each cord. Be sure that older vertical blinds and drapery cords have tension or tie-down devices to hold the cords tight. When buying new mini blinds, vertical blinds and draperies, ask for safety features to prevent child strangulation.
11.  Use door stops and door holders to help prevent injuries to fingers and hands. Door stops and door holders on doors and door hinges can help prevent small fingers and hands from being pinched or crushed in doors and door hinges.
Be sure any safety device for doors is easy to use and is not likely to break into small parts, which could be a choking hazard for young children.

12.  Use a cell or cordless phone to make it easier to continuously watch young children, especially when they’re in bathtubs, swimming pools, or other potentially dangerous areas. Cordless phones help you watch your child continuously without leaving the vicinity to answer a phone call. Cordless phones are especially helpful when children are in or near water, whether it’s the bathtub, the swimming pool, or the beach.

In summary, there are a number of different safety devices that can be purchased to ensure the safety of children in the home. Homeowners can ask an InterNACHI inspector about these and other safety measures during their next inspection.  Parents should be sure to do their own consumer research to find the most effective safety devices for their home that are age-appropriate for their children’s protection, as well as affordable and compatible with their household habits and lifestyles.

Historic Stucco

The Preservation and Repair of Historic Stucco

The term “stucco” is used to describe a type of exterior plaster applied as a two- or three-part coating directly onto masonry, or applied over wood or metal lath to a log or wood-frame structure. Stucco is found in many forms of historic structures throughout the United States. It is so common, in fact, that it frequently goes unnoticed, and is often disguised or used to imitate another material. Historic stucco is also sometimes incorrectly viewed as a sacrificial coating, and consequently removed to reveal stone, brick, or logs that historically were never intended to be exposed. Age and lack of maintenance hasten the deterioration of many historic stucco buildings. Like most historic building materials, stucco is at the mercy of the elements, and even though it is a protective coating, it is particularly susceptible to water damage. Stucco is a material of deceptive simplicity; in most cases, its repair should not be undertaken by a property owner unfamiliar with the art of plastering. Successful stucco repair requires the skill and experience of a professional plasterer. Although several stucco mixes are representative of different periods, they are provided here for reference.  Each project is unique, with its own set of problems that require individual solutions.

  
Historical Background 
  

The stucco on the early-19th century Richardson-Owens-Thomas House in Savannah, Georgia, is a type of natural cement.

Stucco has been used since ancient times. Still widely used throughout the world, it is one of the most common of traditional building materials. Up until the late 1800s, stucco, like mortar, was primarily lime-based, but the popularization of Portland cement changed the composition of stucco, as well as mortar, to a harder material. Historically, the term “plaster” has often been interchangeable with “stucco”; the term is still favored by many, particularly when referring to the traditional lime-based coating. By the 19th century “stucco,” although originally denoting fine interior ornamental plasterwork, had gained wide acceptance in the United States to describe exterior plastering. “Render” and “rendering” are also terms used to describe stucco, especially in Great Britain. Other historic treatments and coatings related to stucco, in that they consist (at least in part) of a similarly plastic or malleable material, include: parging and pargeting, wattle and daub, “cob” or chalk mud, pise de terre, rammed earth, briquete entre poteaux or bousillage, half-timbering, and adobe. All of these are regional variations on traditional mixtures of mud, clay, lime, chalk, cement, gravel or straw. Many are still used today.


The stucco finish on Arlington House, Arlington, Virginia, was marbleized in the 1

Revival Styles Promote the Use of Stucco

The introduction of the many revival styles of architecture around the turn of the 20th century, combined with the improvement and increased availability of Portland cement, resulted in a craze for stucco as a building material in the United States. Beginning about 1890 and gaining momentum into the 1930s and 1940s, stucco was associated with certain historic architectural styles, including Prairie; Art Deco and Art Moderne; Spanish Colonial, Mission, Pueblo, Mediterranean, English Cotswold Cottage, and Tudor Revival styles; as well as the ubiquitous bungalow and four-square house. The fad for Spanish Colonial Revival, and other variations on this theme, was especially important in furthering stucco as a building material in the United States during this period since stucco clearly looked like adobe.

Although stucco buildings were especially prevalent in California, the Southwest, and Florida, ostensibly because of their Spanish heritage, this period also spawned stucco-coated, revival-style buildings all over the United States and Canada. The popularity of stucco as a cheap and readily available material meant that, by the 1920s, it was used for an increasing variety of building types. Resort hotels, apartment buildings, private mansions and movie theaters, railroad stations, and even gas stations and tourist courts took advantage of the “romance” of period styles and adopted the stucco construction that had become synonymous with these styles.


The damage to this stucco appears to be caused by moisture infiltration.

A Practical Building Material

Stucco has traditionally been popular for a variety of reasons. It was an inexpensive material that could simulate finely dressed stonework, especially when scored or lined, in the European tradition. A stucco coating over a less finished and less costly substrate, such as rubblestone, fieldstone, brick, log, or wood frame, gave the building the appearance of being a more expensive and important structure. As a weather-repellent coating, stucco protects the building from wind and rain penetration and also offers a certain amount of fire protection. While stucco was usually applied during construction as part of the building design, particularly over rubblestone or fieldstone, in some instances, it was added later to protect the structure, or when a rise in the owner’s social status demanded a comparable rise in his standard of living.

Composition of Historic Stucco

Before the mid-to-late 19th century, stucco consisted primarily of hydrated or slaked lime, water, and sand, with straw or animal hair mixed in as a binder. Natural cement was frequently used in stucco mixes after their discovery in the United States during the 1820s. Portland cement was first manufactured in the United States in 1871, and it gradually replaced natural cement. After about 1900, most stucco was composed primarily of Portland cement, mixed with some lime. With the addition of Portland cement, stucco became even more versatile and durable. No longer used just as a coating for a substantial material like masonry or log, stucco could now be applied over wood or metal lath attached to a light wood frame. With this increased strength, stucco ceased to be just a veneer and became a more integral part of the building structure.


Caulking is not an appropriate method for repairing cracks in historic stucco.

Today, gypsum, which is hydrated calcium sulfate or sulfate of lime, has, to a great extent, replaced lime.  Gypsum is preferred because it hardens faster and has less shrinkage than lime. Lime is generally used only in the finish coat in contemporary stucco work.

The composition of stucco depends on local custom and available materials. Stucco often contains substantial amounts of mud or clay, marble or brick dust, or even sawdust, and an array of additives ranging from animal blood or urine to eggs, keratin or glue size (animal hooves and horns), varnish, wheat paste, sugar, salt, sodium silicate, alum, tallow, linseed oil, beeswax, and wine, beer or rye whiskey. Waxes, fats, and oils were included to introduce water-repellent properties, sugary materials reduced the amount of water needed and slowed down the setting time, and alcohol acted as an air entrainer. All of these additives contribute to the strength and durability of the stucco.

The appearance of much stucco was determined by the color of the sand — or sometimes burnt clay — used in the mix.  Often, stucco was also tinted with natural pigments, or the surface whitewashed or color-washed after stuccoing was completed. Brick dust could provide color, and other coloring materials that were not affected by lime, mostly mineral pigments, could be added to the mix for the final finish coat. Stucco was also marbled or marbleized — stained to look like stone by diluting oil of vitriol (sulfuric acid) with water, and mixing this with a yellow ochre, or another color. As the 20th century progressed, manufactured and synthetic pigments were added at the factory to some prepared stucco mixes.

Methods of Application

Stucco is applied directly, without lath, to masonry substrates, such as brick, stone, concrete, or hollow tile. But on wood structures, stucco, like its interior counterpart plaster, must be applied over lath in order to obtain an adequate key to hold the stucco. Thus, when applied over a log structure, stucco is laid on horizontal wood lath that has been nailed on vertical wood furring strips attached to the logs. If it is applied over a wood frame structure, stucco may be applied to wood or metal lath nailed directly to the wood frame; it may also be placed on lath that has been attached to furring strips. The furring strips are themselves laid over building paper covering the wood sheathing.


The dry materials must be mixed thoroughly before adding water to make the stucco.
Wood lath was gradually superseded by expanded metal lath introduced in the late 19th and early 20th centuries. When stuccoing over a stone or brick substrate, it was customary to cut back or rake out the mortar joints, if they were not already recessed, by natural weathering or erosion, and sometimes the bricks themselves were gouged to provide a key for the stucco. This helped provide the necessary bond for the stucco to remain attached to the masonry, much like the key provided by wood or metal lath on frame buildings.

Like interior wall plaster, stucco has traditionally been applied as a multiple-layer process, sometimes consisting of two coats, but more commonly as three. Whether applied directly to a masonry substrate or onto wood or metal lath, this consists of a first “scratch” or “pricking-up” coat, followed by a second scratch coat, sometimes referred to as a “floating” or “brown” coat, followed finally by the “finishing” coat. Up until the late 19th century, the first and the second coats were of much the same composition, generally consisting of lime or natural cement, sand, perhaps clay, and one or more of the additives previously mentioned. Straw or animal hair was usually added to the first coat as a binder. The third, or finishing coat, consisted primarily of a very fine mesh-grade of lime and sand, and sometimes pigment. As already noted, after the 1820s, natural cement was also a common ingredient in stucco, until it was replaced by Portland cement. Both masonry and wood lath must be kept wet or damp to ensure a good bond with the stucco. Wetting these materials helps to prevent them from pulling moisture out of the stucco too rapidly, which results in cracking, loss of bond, and generally poor-quality stucco work.

Traditional Stucco Finishes

Until the early 20th century when a variety of novelty finishes and textures were introduced, the last coat of stucco was commonly given a smooth, troweled finish, and then scored or lined in imitation of ashlar. The illusion of masonry joints was sometimes enhanced by a thin line of white lime putty, graphite, or some other pigment. Some 19th-century buildings feature a water table or raised foundation of roughcast stucco that differentiates it from the stucco surface above, which is smooth and scored. Other novelties and textured finishes associated with the “period” or revival styles of the early 20th century include the English cottage finish, adobe and Spanish, pebble-dashed or dry-dash surface, fan and sponge texture, reticulated and vermiculated, roughcast (or wet dash), and sgraffito.

Regular Maintenance

Although A.J. Downing alluded to stuccoed houses in Pennsylvania that had survived for over a century in relatively good condition, historic stucco is inherently not a particularly permanent or long-lasting building material. Regular maintenance is required to keep it in good condition. Unfortunately, many older and historic buildings are not always accorded this kind of care. An InterNACHI inspector can be consulted for advice regarding stucco maintenance.

Because building owners knew stucco to be protective, but also somewhat fragile coating, they employed a variety of means to prolong its usefulness. The most common treatment was to whitewash stucco, often annually. The lime in the whitewash offered protection and stability and helped to harden the stucco. Most importantly, it filled hairline cracks before they could develop into larger cracks and let in moisture. To improve water repellency, stucco buildings were also sometimes coated with paraffin, another type of wax, or other stucco-like coatings, such as oil mastics.

Assessing Damage

Most stucco deterioration is the result of water infiltration into the building’s structure, either through the roof, around chimneys, window and door openings, or excessive groundwater or moisture penetrating through or splashing up from the foundation. Potential causes of deterioration include ground settlement lintel and door frame settlement; inadequate and leaking gutters and downspouts; intrusive vegetation; moisture migration within walls due to interior condensation and humidity; vapor drive problems caused by the furnace, bathroom, and kitchen vents; and rising damp resulting from excessive groundwater and poor drainage around the foundation. Water infiltration will cause wood lath to rot, and metal lath and nails to rust, which eventually will cause stucco to lose its bond and pull away from its substrate.


The deteriorated surface of this catch basin is being re-stuccoed.

After the cause of deterioration has been identified, any necessary repairs to the building should be made first before repairing the stucco. Such work is likely to include repairs designed to keep excessive water away from the stucco, such as roof, gutter, downspout and flashing repairs, improving drainage, and redirecting rainwater runoff and splash-back away from the building. Horizontal areas, such as the tops of parapet walls and chimneys, are particularly vulnerable to water infiltration and may require modifications to their original design, such as the addition of flashing to correct the problem.

Previous repairs inexpertly carried out may have caused additional deterioration, particularly if executed in Portland cement, which tends to be very rigid and, therefore, incompatible with early, mostly soft lime-based stucco that is more flexible. Incompatible repairs, external vibration caused by traffic and construction, and building settlements can also result in cracks that permit the entrance of water and cause the stucco to fail.

Before beginning any stucco repair, an assessment of the stucco should be undertaken to determine the extent of the damage, and how much must be replaced or repaired. Testing should be carried out systematically on all elevations of the building to determine the overall condition of the stucco. Some areas in need of repair will be clearly evidenced by missing sections of stucco or stucco layers. Bulging or cracked areas are obvious places to begin. Unsound, punky, or soft areas that have lost their key will echo with a hollow sound when tapped gently with a wooden or acrylic hammer or mallet.

Identifying the Stucco Type

Analysis of the historic stucco will provide useful information on its primary ingredients and their proportions and will help to ensure that the new replacement stucco will duplicate the old in strength, composition, color, and texture as closely as possible. However, unless authentic, period restoration is required, it may not be worthwhile, nor in many instances even possible, to attempt to duplicate all of the ingredients (particularly some of the additives) in creating the new stucco mortar. Some items are no longer available, and others, notably sand and lime — the major components of traditional stucco — have changed radically over time. For example, most sand used in contemporary masonry work is manufactured sand, because river sand, which was used historically, is difficult to obtain today in many parts of the country. The physical and visual qualities of manufactured sand versus river sand are quite different, and this affects the way stucco works, as well as the way it looks. The same is true of lime, which is frequently replaced by gypsum in modern stucco mixes. And even if the identification of all the items in the historic stucco mix were possible, the analysis would still not reveal how the original stucco was mixed and applied.

There are, however, simple tests that can be carried out on a small piece of stucco to determine its basic makeup. A dilute solution of hydrochloric (muriatic) acid will dissolve lime-based stucco, but not Portland cement. Although the use of Portland cement became common after 1900, there are no precise cutoff dates, as stuccoing practices varied among individual plasterers, and from region to region. Some plasterers began using Portland cement in the 1880s, but others may have continued to favor lime stucco well into the early 20th century. While it is safe to assume that a late-18th or early-19th century stucco is lime-based, late-19th or early-20th century stucco may be based on either lime or Portland cement. Another important factor to take into consideration is that an early lime-stucco building is likely to have been repaired many times over the ensuing years, and it is probable that at least some of these patches consist of Portland cement.

Planning the Repair

Once the extent of damage has been determined, a number of repair options may be considered. Small hairline cracks usually are not serious and may be sealed with a thin slurry coat consisting of the finish coat ingredients, or even with a coat of paint or whitewash.

Commercially available caulking compounds are not suitable materials for patching hairline cracks. Because their consistency and texture is unlike that of stucco, they tend to weather differently, and attract more dirt; as a result, repairs made with caulking compounds may be highly visible and unsightly. Larger cracks will have to be cut out in preparation for more extensive repair. Most stucco repairs will require the skill and expertise of a professional plasterer.


The stucco will be applied to the wire lath laid over the area to be patched.

In the interest of saving or preserving as much as possible of the historic stucco, patching rather than wholesale replacement is preferable. When repairing heavily textured surfaces, it is not usually necessary to replace an entire wall section, since the textured finish, if well-executed, tends to conceal patches, and helps them to blend in with the existing stucco. However, because of the nature of smooth-finished stucco, patching a number of small areas scattered over one elevation may not be a successful repair approach unless the stucco has been previously painted, or is to be painted following the repair work. On unpainted stucco, such patches are hard to conceal, because they may not match exactly or blend in with the rest of the historic stucco surface. For this reason, it is recommended, if possible, that stucco repair be carried out in a contained or well-defined area, or if the stucco is scored, the repair patch should be “squared-off” in such a way as to follow existing scoring. In some cases, especially in a highly visible location, it may be preferable to re-stucco an entire wall section or feature. In this way, any differences between the patched area and the historic surface will not be so readily apparent.

The repair of historic stucco generally follows most of the same principles used in plaster repair. First, all deteriorated, severely cracked and loose stucco should be removed down to the lath (assuming that the lath is securely attached to the substrate), or down to the masonry if the stucco is directly applied to a masonry substrate. A clean surface is necessary to obtain a good bond between the stucco and the substrate. The areas to be patched should be cleaned of all debris with a bristle brush, and all plant growth, dirt, loose paint, oil, and grease should be removed. If necessary, brick or stone mortar joints should then be raked out to a depth of approximately 5/8-inches to ensure a good bond between the substrate and the new stucco.

To obtain a neat repair, the area to be patched should be squared-off with a butt joint using a cold chisel, a hatchet, a diamond blade saw, or a masonry bit. Sometimes, it may be preferable to leave the area to be patched in an irregular shape, which may result in a less conspicuous patch. Proper preparation of the area to be patched requires very sharp tools and extreme caution on the part of the plasterer not to break keys of surrounding good stucco by “over-sounding” when removing deteriorated stucco.

To ensure a firm bond, the new patch must not overlap the old stucco. If the stucco has lost its bond or key from wood lath, or the lath has deteriorated or come loose from the substrate, a decision must be made whether to try to re-attach the old lath, to replace deteriorated lath with new wood lath, or to leave the historic wood lath in place and supplement it with modern expanded metal lath. Unless authenticity is important, it is generally preferable (and easier) to nail new metal lath over the old wood lath to support the patch. Metal lath that is no longer securely fastened to the substrate may be removed and replaced in kind, or left in place and supplemented with a new wire lath.

When repairing lime-based stucco applied directly to masonry, the new stucco should be applied in the same manner, directly onto the stone or brick. The stucco will bond onto the masonry itself without the addition of lath because of the irregularities in the masonry or those of its mortar joints, or because its surface has been scratched, scored or otherwise roughened to provide an additional key. Cutting out the old stucco at a diagonal angle may also help secure the bond between the new and the old stucco. For the most part, it is not advisable to insert metal lath when re-stuccoing historic masonry in sound condition, as it can hasten deterioration of the repair work. Not only will attaching the lath damage the masonry, but the slightest moisture penetration can cause metal lath to rust. This will cause the metal to expand, eventually resulting in spalling of the stucco, and possibly the masonry substrate, too.
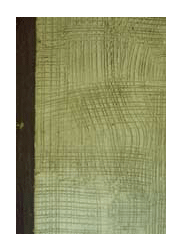
  

The final finish coat will be applied to this scratch coat.

If the area to be patched is properly cleaned and prepared, a bonding agent is usually not necessary. However, a bonding agent may be useful when repairing hairline cracks, or when dealing with substrates that do not offer a good bonding surface. These may include dense stone or brick, previously painted or stuccoed masonry, or spalling brick substrates. A good mechanical bond is always preferable to reliance on bonding agents. Bonding agents should not be used on a wall that is likely to remain damp or where large amounts of salt are present. Many bonding agents do not survive well under such conditions, and their use could jeopardize the longevity of the stucco repair.

A stucco mix compatible with the historic stucco should be selected after analyzing the existing stucco. It can be adapted from a standard traditional mix of the period, or based on one of the mixes included here. Stucco consisting mostly of Portland cement generally will not be physically compatible with the softer, more flexible, lime-rich historic stuccos used throughout the 18th and much of the 19th centuries. The differing expansion and contraction rates of lime stucco and Portland cement stucco will normally cause the stucco to crack. Choosing a stucco mix that is durable and compatible with the historic stucco on the building is likely to involve considerable trial and error, and probably will require a number of test samples, and even more, if it is necessary to match the color. It is best to let the stucco test samples weather as long as possible — ideally, one year, or at least through a change of seasons — in order to study the durability of the mix and its compatibility with the existing stucco, as well as the weathering of the tint, if the building will not be painted and color-match is an important factor.

If the test samples are not executed on the building, they should be placed next to the stucco remaining on the building to compare the color, texture, and composition of the samples with the original. The number and thickness of stucco coats used in the repair should also match the original.

After thoroughly dampening the masonry or wood lath, the first scratch coat should be applied to the masonry substrate, or wood or metal lath, in a thickness that corresponds to the original (if extant), or generally about 1/4-inch to 3/8-inch. The scratch coat should be scratched or crosshatched with a comb to provide a key to hold the second coat. It usually takes 24 to 72 hours, and longer in cold weather, for each coat to dry before the next coat can be applied. The second coat should be about the same thickness as the first, and the total thickness of the first two coats should generally not exceed about 5/8-inch. This second or leveling coat should be roughened using a wood float with a nail protruding to provide a key for the final or finish coat. The finish coat, about 1/4-inch thick, is applied after the previous coat has initially set. If this is not feasible, the base coat should be thoroughly dampened when the finished coat is applied later. The finish coat should be worked to match the texture of the original stucco.

Colors and Tints for Historic Stucco Repair


The new addition on the right is stucco scored to imitate the limestone of the historic building on the left.

The color of most early stucco was supplied by the aggregate included in the mix — usually, the sand. Sometimes, natural pigments were added to the mix, and 18th- and 19th-century scored stucco was often marbleized or painted in imitation of marble and granite. Stucco was also frequently coated with whitewash or a color wash. This tradition later evolved into the use of paint, its popularity depending on the vagaries of fashion, as much as a means of concealing repairs. Because most of the early colors were derived from nature, the resultant stucco tints tended to be mostly earth tones. This was true until the advent of brightly colored stucco in the early decades of the 20th century. This was the so-called “Jazz Plaster” developed by O.A. Malone, the “man who put color into California,” and who founded the California Stone Products Corporation in 1927. California Stucco was revolutionary for its time as the first stucco/plaster to contain colored pigment in its pre-packaged factory mix.

When patching or repairing a historic stucco surface known to have been tinted, it may be possible to determine through visual or microscopic analysis whether the source of the coloring is sand, cement, or pigment. Although some pigments or aggregates used traditionally may no longer be available, a sufficiently close color match can generally be approximated using sand, natural or mineral pigments, or a combination of these. Obtaining such a match will require testing and comparing the color of the dried test samples to the original. Successfully combining pigments in the dry stucco mix prepared for the finish coat requires considerable skill. The amount of pigment must be carefully measured for each batch of stucco. Overworking the mix can make the pigment separate from the lime. Changing the amount of water added to the mix, or using water to apply the tinted finish coat, will also affect the color of the stucco when it dries.

Generally, the color obtained by hand-mixing these ingredients will provide a sufficiently close match to cover an entire wall or an area distinct enough from the rest of the structure that the color differences will not be obvious. However, it may not work for small patches conspicuously located on a primary elevation, where color differences will be especially noticeable. In these instances, it may be necessary to conceal the repairs by painting the entire patched elevation, or even the whole building.

Many stucco buildings have been painted over the years and will require re-painting after the stucco repairs have been made. Limewash or cement-based paint, latex paint, or oil-based paint are appropriate coatings for stucco buildings. The most important factor to consider when repainting a previously painted or coated surface is that the new paint be compatible with any coating already on the surface. In preparation for re-painting, all loose and peeling paint, and other coating material not firmly adhered to the stucco, must be removed by hand-scraping or natural bristle brushes. The surface should then be cleaned.

Cement-based paints, most of which now contain some Portland cement and are really a type of limewash, have traditionally been used on stucco buildings. The ingredients were easily obtainable. Furthermore, the lime in such paints actually bonded or joined with the stucco and provided a very durable coating. In many regions, whitewash was applied annually during spring cleaning. Modern, commercially available, pre-mixed masonry and mineral-based paints may also be used on historic stucco buildings.

If the structure must be painted for the first time to conceal repairs, almost any of these coatings may be acceptable, depending on the situation. Latex paint, for example, maybe applied to slightly damp walls or where there is an excess of moisture, but latex paint will not stick to chalky or powdery areas. Oil-based or alkyd paints must be applied only to dry walls; new stucco must cure up to a year before it can be painted with oil-based paint.

Contemporary Stucco Products

There are many contemporary stucco products on the market today. Many of them are not compatible, either physically or visually, with historic stucco buildings. Such products should be considered for use only after consulting with a specialist in historic masonry. However, some of these pre-packaged tinted stucco coatings may be suitable for use on stucco buildings dating from the late 19th and early 20th centuries, as long as the color and texture are appropriate for the period and style of the building. While some masonry contractors may, as a matter of course, suggest that a water-repellent coating be applied after repairing old stucco, in most cases, this should not be necessary, since color washes and paints serve the same purpose, and stucco itself is a protective coating.

Cleaning Historic Stucco Surfaces

Historic stucco buildings often exhibit multiple layers of paint or limewash. Although some stucco surfaces may be cleaned by water-washing, the relative success of this procedure depends on two factors: the surface texture of the stucco, and the type of dirt to be removed. If simply removing airborne dirt, smooth unpainted stucco, and heavily-textured painted stucco, may sometimes be cleaned using a low-pressure water wash, supplemented by scrubbing with soft natural bristle brushes, and possibly non-ionic detergents. Organic plant material, such as algae and mold, and metallic stains may be removed from stucco using poultices and appropriate solvents. Although these same methods may be employed to clean unpainted roughcast, pebble-dash, or any stucco surface featuring exposed aggregate, due to the surface irregularities, it may be difficult to remove dirt without also removing portions of the decorative textured surface. Difficulty in cleaning these surfaces may explain why so many of these textured surfaces have been painted.

When Total Replacement is Necessary

Complete replacement of the historic stucco with new stucco of either a traditional or modern mix will probably be necessary only in cases of extreme deterioration — that is, a loss of bond on over 40% to 50% of the stucco surface. Another reason for total removal might be that the physical and visual integrity of the historic stucco has been so compromised by prior incompatible and ill-conceived repairs that patching would not be successful.

When stucco no longer exists on a building, there is more flexibility in choosing a suitable mix for the replacement. Since compatibility of old and new stucco will not be an issue, the most important factors to consider are durability, color, texture and finish. Depending on the construction and substrate of the building, in some instances, it may be acceptable to use a relatively strong cement-based stucco mortar. This is certainly true for many late 19th and early 20th century buildings, and may even be appropriate to use on some stone substrates, even if the original mortar would have been weaker, as long as the historic visual qualities noted above have been replicated. Generally, the best principle to follow for a masonry building is that the stucco mix, whether for repair or replacement of historic stucco, should be somewhat weaker than the masonry to which it is to be applied in order not to damage the substrate.

General Guidance for Historic Stucco Repair

A skilled professional plasterer will be familiar with the properties of materials involved in stucco repair and will be able to avoid some of the pitfalls that would hinder someone less experienced. General suggestions for successful stucco repair parallel those involving restoration and repair of historic mortar and plaster. In addition, the following principles are important to remember:

  • Mix only as much stucco as can be used in one-and-a-half to two hours. This will depend on the weather (mortar will harden faster under hot and dry, or sunny conditions).  Experience is likely to be the best guidance. Any remaining mortar should be discarded; it should not be re-tempered.
  • Stucco mortar should not be over-mixed. (Hand mix it for 10 to 15 minutes after adding water, or machine-mix for three to four minutes after all ingredients are in mixer.) Over-mixing can cause crazing and discoloration, especially in tinted mortars. Over-mixing will also tend to make the mortar set too fast, which will result in cracking and poor bonding or keying to the lath or masonry substrate.
  • Wood lath or a masonry substrate, but not metal lath, must be thoroughly wetted before applying stucco patches so that it does not draw moisture out of the stucco too rapidly. To a certain extent, bonding agents also serve this same purpose. Wetting the substrate helps retard drying.
  • To prevent cracking, it is imperative that stucco not dry too fast. Therefore, the area to be stuccoed should be shaded, or even covered, if possible, particularly in hot weather. It is also a good idea in hot weather to keep the newly stuccoed area damp, at approximately 90% humidity, for a period of 48 to 72 hours.
  • Stucco repairs, like most other exterior masonry work, should not be undertaken in cold weather (below 40 degrees Fahrenheit, and preferably warmer), or if there is a danger of frost.

Historic Stucco Textures

Most of the oldest stucco in the U.S. dating prior to the late 19th century will generally have a smooth, troweled finish (sometimes called a “sand” or “float” finish), possibly scored to resemble ashlar masonry units. Scoring may be incised to simulate masonry joints, the scored lines may be emphasized by black or white penciling, or the lines may simply be drawn or painted on the surface of the stucco. In some regions, at least as early as the first decades of the 19th century, it was not uncommon to use a roughcast finish on the foundation or base of an otherwise smooth-surfaced building. Roughcast was also used as an overall stucco finish for some outbuildings and other less-important types of structures.


This stucco house has a roughcast finish.

A wide variety of decorative surface textures may be found on revival style stucco buildings, particularly residential architecture. These styles evolved in the late 19th century and peaked in popularity in the early decades of the 20th century. Frank Lloyd Wright favored a smooth finish stucco, which was imitated on much of the Prairie style architecture inspired by his work. Some of the more picturesque surface textures include English Cottage or English Cotswold finish; sponge finish; fan texture; adobe finish; and Spanish or Italian finish. Many of these finishes and countless other regional and personalized variations on them are still in use.

The most common early 20th-century stucco finishes are often found on bungalow-style houses and include: spatter or spatter dash (sometimes called roughcast, harling, or wet dash), and pebble-dash or dry dash. The spatter dash finish is applied by throwing the stucco mortar against the wall using a whisk broom or a stiff fiber brush, and it requires considerable skill on the part of the plasterer to achieve a consistently rough wall surface. The mortar used to obtain this texture is usually composed simply of regular sand, lime, and cement mortar, although it may sometimes contain small pebbles or crushed stone aggregate, which replaces half the normal sand content. The pebble-dash or dry dash finish is accomplished manually by the plasterer throwing or “dashing” dry pebbles (about 1/8-inch to 1/4-inch in size)onto a coat of stucco freshly applied by another plasterer. The pebbles must be thrown at the wall with a scoop with sufficient force and skill that they will stick to the stuccoed wall. A more even or uniform surface can be achieved by patting the stones down with a wooden float. This finish may also be created using a texturing machine.

Stucco on historic buildings is especially vulnerable not only to the wear of time and exposure to the elements but also at the hands of well-intentioned “restorers” who may want to remove stucco from 18th and 19th-century structures to expose what they believe to be the original or more “historic” brick, stone or log underneath. Historic stucco is a character-defining feature and should be considered an important historic building material, significant in its own right. While many 18th and 19th century buildings were stuccoed at the time of construction, others were stuccoed later for reasons of fashion or practicality. As such, it is likely that this stucco has acquired significance, over time, as part of the history and evolution of a building. Thus, even later, non-historic stucco should be retained, in most instances; and similar logic dictates that new stucco should not be applied to a historic building that was not stuccoed previously. When repairing historic stucco, the new stucco should duplicate the old as closely as possible in strength, composition, color, and texture.
This article was sourced from the United States National Park Service

Plumbing Terms

Plumbing may be defined as the practice, materials and fixtures used in the installation, maintenance and alteration of all piping, fixtures, appliances and appurtenances in connection with sanitary and storm drainage facilities, the venting system, and public and private water supply systems. Plumbing does not include the trade of drilling water wells, installing water-softening equipment, or the business of manufacturing or selling plumbing fixtures, appliances, equipment or hardware. A plumbing system consists of three separate parts: an adequate potable water supply system; a safe, adequate drainage system; and ample fixtures and equipment. 

Background Factors 

The generalized inspection of a home is concerned with a safe water supply system, an adequate drainage system, and ample and proper fixtures and equipment. This article explains features of a residential plumbing system, and the basic plumbing terms the inspector must know and understand to properly identify housing code violations involving plumbing and the more complicated defects that s/he will refer to the appropriate agencies. Only InterNACHI inspectors are sufficiently trained to spot complicated defects that others will overlook.
Definitions

Air Chambers

Pressure absorbing devices that eliminate water hammer. They should be installed as close as possible to the valves or faucet and at the end of long runs of pipe.
Air Gap (Drainage System)
The unobstructed vertical distance through the free atmosphere between the outlet of a water pipe and the flood level rim of the receptacle into which it is discharging.
Air Gap (Water Distribution System)
The unobstructed vertical distance through the free atmosphere between the lowest opening from any pipe or faucet supplying water to a tank, plumbing fixture, or other device and the flood level rim of the receptacle.
Air Lock
An air lock is a bubble of air which restricts the flow of water in a pipe.
Backflow
The flow of water or other liquids, mixtures, or substances into the distributing pipes of a potable water supply from any source or sources other than the intended source. Back siphonage is one type of backflow.
Back Siphonage
The flowing back of used, contaminated, or polluted water from a plumbing fixture or vessel into a potable water supply due to a negative pressure in the pipe.
Branch
Any part of the piping system other than the main, riser, or stack.
Branch Vent
A vent connecting one or more individual vents with a vent stack.
Building Drain
The part of the lowest piping of a drainage system that receives the discharge from soil, waste, or other drainage pipes inside the walls of the building (house) and conveys it to the building sewer beginning 3 feet outside the building wall.
Cross Connection
Any physical connection or arrangement between two otherwise separate piping systems, one of which contains potable water and the other either water of unknown or questionable safety or steam, gas, or chemical whereby there may be a flow from one system to the other, the direction of flow depending on the pressure differential between the two systems. (See Backflow and Back siphonage.)
Disposal Field
An area containing a series of one or more trenches lined with coarse aggregate and conveying the effluent from the septic tank through vitrified clay Pine or perforated, non-metallic pipe, laid in such a manner that the flow will be distributed with reasonable uniformity into natural soil.
Drain
Any pipe that carries waste water or water-borne waste in a building (house) drainage system.
Flood Level Rim
The top edge of a receptacle from which water overflows.
Flushometer Valve
A device that discharges a predetermined quantity of water to fixtures for flushing purposes and is closed by direct water pressures.
Flush Valve
A device located at the bottom of the tank for flushing water closets and similar fixtures.
Grease Trap
See Interceptor.
Hot Water
Potable water that is heated to at least 120°F and used for cooking, cleaning, washing dishes, and bathing.
Insanitary
Contrary to sanitary principles injurious to health.
Interceptor
A device designed and installed so as to separate and retain deleterious, hazardous, or undesirable matter from normal wastes and permit normal sewage or liquid wastes to discharge into the drainage system by gravity.
Leader
An exterior drainage pipe for conveying storm water from roof or gutter drains to the building storm drain, combined building sewer, or other means of disposal.
Main Vent
The principal artery of the venting system, to which vent branches may be connected.
Main Sewer
See Public Sewer.
Pneumatic
The word pertains to devices making use of compressed air as in pressure tanks boosted by pumps.
Potable Water
Water having no impurities present in amounts sufficient to cause disease or harmful physiological effects and conforming in its bacteriological and chemical quality to the requirements of the Public Health Service drinking water standards or meeting the regulations of the public health authority having jurisdiction.
P & T (Pressure and Temperature) Relief Valve
A safety valve installed on a hot water storage tank to limit temperature and pressure of the water.
P Trap
A trap with a vertical inlet and a horizontal outlet.
Public Sewer
A common sewer directly controlled by public authority.
Relief Vent
An auxiliary vent that permits additional circulation of air in or between drainage and vent systems.
Septic Tank
A watertight receptacle that receives the discharge of a building’s sanitary drain system or part thereof and is designed and constructed so as to separate solid from the liquid, digest organic matter through a period of detention, and allow the liquids to discharge into the soil outside of the tank through a system of open-joint or perforated piping, or through a seepage pit.
Sewerage System
A sewerage system comprises all piping, appurtenances, and treatment facilities used for the collection and disposal of sewage, except plumbing inside and in connection with buildings served and the building drain.
Soil Pipe
The pipe that directs the sewage of a house to the receiving sewer, building drain, or building sewer.
Soil Stack
The vertical piping that terminates in a roof vent and carries off the vapors of a plumbing system.
Stack Vent
An extension of a solid or waste stack above the highest horizontal drain connected to the stack. Sometimes called a waste vent or a soil vent.
Storm Sewer
A sewer used for conveying rain water, surface water, condensate. cooling water, or similar liquid waste.
Trap
A trap is a fitting or device that provides a liquid seal to prevent the emission of sewer gases without materially affecting the flow of sewage or waste water through it.
Vacuum Breaker
A device to prevent backflow (back siphonage) by means of an opening through which air may be drawn to relieve negative pressure (vacuum).
Vent Stack
The vertical vent pipe installed to provide air circulation to and from the drainage system and that extends through one or more stories.
Water Hammer
The loud thump of water in a pipe when a valve or faucet is suddenly closed.
Water Service Pipe
The pipe from the water main or other sources of potable water supply to the water-distributing system of the building served.
Water Supply System
The water supply system consists of the water service pipe, the water-distributing pipes, the necessary connecting pipes, fittings, control valves, and all appurtenances in or adjacent to the building or premises.
Wet Vent
A vent that receives the discharge of waste other than from water closets.
Yoke Vent
A pipe connecting upward from a soil or waste stack to a vent stack for the purpose of preventing pressure changes in the stacks.
Main Features of an Indoor Plumbing System

The primary functions of the plumbing system within the house are as follows:

  1. To bring an adequate and potable supply of hot and cold water to the users of the dwelling.
  2. To drain all waste water and sewage discharged from these fixtures into the public sewer, or private disposal system.

It is, therefore, very important that the housing inspector familiarize himself fully with all elements of these systems so that he may recognize inadequacies of the structure’s plumbing as well as other code violations.

Elements of a Plumbing System  

Water Service: The piping of a house service line should be as short as possible. Elbows and bends should be kept to a minimum since these reduce the pressure and therefore the supply of water to fixtures in the house. The house service line should also be protected from freezing. The burying of the line under 4 feet of soil is a commonly accepted depth to prevent freezing. This depth varies, however, across the country from north to south. The local or state plumbing code should be consulted for the recommended depth in your area of the country.

The materials used for a house service may be copper, cast iron, steel or wrought iron. The connections used should be compatible with the type of pipe used. 

  • Corporation stop:  The corporation stop is connected to the water main. This connection is usually made of brass and can be connected to the main by use of a special tool without shutting off the municipal supply. The valve incorporated in the corporation stop permits the pressure to be maintained in the main while the service to the building is completed.
  •  Curb stop:  The curb stop is a similar valve used to isolate the building from the main for repairs, nonpayment of water bills, or flooded basements. Since the corporation stop is usually under the street and would necessitate breaking the pavement to reach the valve, the curb stop is used as the isolation valve.
  • Curb stop box:  The curb stop box is an access box to the curb stop for opening and closing the valve. A long-handled wrench is used to reach the valve.
  • Meter stop:  The meter stop is a valve placed on the street side of the water meter to isolate the meter for installation or maintenance. Many codes require a gate valve on the house side of the meter to shut off water for house plumbing repairs. The curb and meter stops are not to be used frequently and can be ruined in a short time if used very frequently.
  • Water meter:  The water meter is a device used to measure the amount of water used in the house. It is usually the property of the city and is a very delicate instrument that should not be abused. Since the electric system is usually grounded to the water line, a grounding loop-device should be installed around the meter. Many meters come with a yoke that maintains electrical continuity even though the meter is removed.

Hot and Cold Water Main Lines: The hot and cold water main lines are usually hung from the basement ceiling and are attached to the water meter and hot-water tank on one side and the fixture supply risers on the other. These pipes should be installed in a neat manner and should be supported by pipe hangers or straps of sufficient strength and number to prevent sagging. Hot and cold water lines should be approximately 6 inches apart unless the hot water line is insulated. This is to insure that the cold water line does not pick up heat from the hot water line. The supply mains should have a drain valve or stop and waste valve in order to remove water from the system for repairs. These valves should be on the low end of the line or on the end of each fixture riser.

The fixture risers start at the basement main and rise vertically to the fixtures on the upper floors. In a one-family dwelling, riser branches will usually proceed from the main riser to each fixture grouping. In any event the fixture risers should not depend on the branch risers for support but should be supported with a pipe bracket. Each fixture is then connected to the branch riser by a separate line. The last fixture on a line is usually connected directly to the branch riser.

Hot Water Heaters: Hot water heaters are usually powered by electricity, fuel oil, gas, or in rare cases, coal or wood. They consist of a space for heating the water and a storage tank for providing hot water over a limited period of time. All hot water heaters should be fitted with a temperature-pressure relief valve no matter what fuel is used. This valve will operate when either the temperature or the pressure becomes too high due to an interruption of the water supply or a faulty thermostat.

Pipe Sizes: The size of basement mains and risers depends on the number of fixtures supplied. However, a 3/4-inch pipe is usually the minimum size used. This allows for deposits on the pipe due to hardness in the water and will usually give satisfactory volume and pressure.

Drainage System

The water supply brought into the house and used is discharged through the drainage system. This system is either a sanitary drainage system carrying just interior waste water or a combined system carrying interior waste and roof runoff.

Sanitary Drainage System: The proper sizing of the sanitary drain or house drain depends on the number of fixtures it serves. The usual minimum size is 6 inches in dial diameter. The materials used are usually cast iron, vitrified clay, plastic, and in rare cases, lead. For proper flow in the drain the pipe should be sized so that it flows approximately one-half full. This ensures proper scouring action so that the solids contained in the waste will not be deposited in the pipe.

  • Sizing of house drain – The Uniform Plumbing Code Committee has developed a method of sizing of house drains in terms of “fixture units.” One ”fixture unit” equals approximately 71 D2 gallons of water per minute. This is the surge flow-rate of water discharged from a wash basin in 1 minute. All other fixtures have been related to this unit.

Sanitary Drain Sizes

  • Grade of house drain – A house drain or building sewer should be sloped toward the sewer to ensure scouring of the drain. The usual pitch of a house or building sewer is 1 D4 inch fall in 1 foot of length.
  • Fixture and branch drains – A branch drain is a waste pipe that collects the waste from two or more fixtures and conveys it to the building or house sewer. It is sized in the same way as the house sewer, taking into account that all water closets must have a minimum 3-inch diameter drain, and only two water closets may connect into one 3-inch drain.

All branch drains must join the house drain with a “Y” -type fitting. The same is true for fixture drains joining branch drains. The “Y” fitting is used to eliminate, as much as possible, the deposit of solids in or near the connection. A build-up of these solids will cause a blockage in the drain.

  • Traps – A plumbing trap is a device used in a waste system to prevent the passage of sewer gas into the structure and yet not hinder the fixture’s discharge to any great extent. All fixtures connected to a household plumbing system should have a trap installed in the line.

The effect of sewer gases on the human body are known; many are extremely harmful. Additionally, certain sewer gases are explosive. A trap will prevent these gases from passing into the structure. The depth of the seal in a trap is usually 2 inches. A deep seal trap has a 4-inch seal.

The purpose of a trap is to seal out sewer gases from the structure. Since a plumbing system is subject to wide variations in flow, and this flow originates in many different sections of the system, there is a wide variation in pressures in the waste lines. These pressure differences tend to destroy the water seal in the trap. To counteract this problem mechanical traps were introduced. It has been found, however, that the corrosive liquids flowing in the system corrode or jam these mechanical traps. It is for this reason that most plumbing codes prohibit mechanical traps.
There are many manufacturers of traps, and all have varied the design somewhat. The “P” trap is usually found in lavatories, sinks, urinals, drinking fountains, showers, and other installations that do not discharge a great deal of water.

Drum trap

The drum trap is another water seal-type trap. They are usually used in the 4×5-inch or 4×8-inch sizes. These traps have a greater sealing capacity than the “P” trap and pass large amounts of water quickly. Drum traps are commonly connected to bathtubs, foot baths, sitz baths, and modified shower baths.

Objectionable traps

The “S” 1 and the 3h “S” trap should not be us in plumbing installations. They are almost impossible to ventilate properly, and the 3h “S” trap forms a perfect siphon.
The bag trap, an extreme form of “S” trap, is seldom found.

Any trap that depends on a moving part for its effectiveness is usually inadequate and has been prohibited by the local plumbing codes. These traps work, but their design usually results in their being higher priced than the “P” or drum traps. It should be remembered that traps are used only to prevent the escape of sewer gas into the structure. They do not compensate for pressure variations. Only proper venting will eliminate pressure problems.

Ventilation
A plumbing system is ventilated to prevent trap seal loss, material deterioration. and flow retardation.

Trap Seal Loss

The seal in a plumbing trap may be lost due to siphonage (direct and indirect or momentum), back pressure, evaporation, capillary attraction, or wind effect. The first two named are probably the most common causes of loss. If a waste pipe is placed vertically after the fixture trap, as in an “S” trap, the waste water continues to flow after the fixture is emptied and clears the trap. This is caused by the pressure of air on the fixture water’s being greater than the pressure of air in the waste pipe. The action of the water discharging into the waste pipe removes the air from that pipe and thereby causes a negative pressure in the waste line. In the case of indirect or momentum siphonage, the flow of water past the entrance to a fixture drain in the waste pipe removes air from the fixture drain. This reduces the air pressure in the fixture drain, and the entire assembly acts as an aspirator such as the physician uses to spray an infected throat.

Back Pressure

The flow of water in a soil pipe varies according to the fixtures being used. A lavatory gives a small flow and a water closet a large flow. Small flows tend to cling to the sides of the pipe, but large ones form a slug of waste as they drop. As this slug of water falls down the pipe the air in front of it becomes pressurized. As the pressure builds it seeks an escape point. This point is either a vent or a fixture outlet. If the vent is plugged or there is no vent, the only escape for this air is the fixture outlet. The air pressure forces the trap seal up the pipe into the fixture. If the pressure is great enough the seal is blown out of the fixture entirely. Figures 6-17 and 6-18 illustrate this type of problem.

Vent Sizing

Vent pipe installation is similar to that of soil and waste pipe. The same fixture unit criteria are used. Vent pipes of less than 11 D4 inches in diameter should not be used. Vents smaller than this diameter tend to clog and do not perform their function.
  • Individual fixture ventilation:  This type of ventilation is generally used for sinks, lavatories, drinking fountains, and so forth
  • Unit venting:  The unit venting system is commonly used in apartment buildings. This type of system saves a great deal of money and space when fixtures are placed back to back in separate apartments.
  • Wet venting:  Wet venting of a plumbing system is common in household bathroom fixture grouping. It is exactly what the name implies: the vent pipe is used as a waste line.
Total Drainage System
Up to now we have covered the drain, soil waste, and vent systems of a plumbing system separately. For a working system, however, they must all be connected.

Holiday Safety Tips

  
The winter holidays are a time for celebration, and that means more cooking, home decorating, entertaining, and an increased risk of fire and accidents. Holiday home safety is often over looked during this time of the year. NxtMove Inspections recommends that you follow these guidelines to help make your holiday season safer and more enjoyable.
Holiday Lighting
  • Use caution with holiday decorations and, whenever possible, choose those made with flame-resistant, flame-retardant and non-combustible materials.
  • Keep candles away from decorations and other combustible materials, and do not use candles to decorate Christmas trees.
  • Carefully inspect new and previously used light strings, and replace damaged items before plugging lights in. If you have any questions about electrical safety, ask an InterNACHI inspector during your next scheduled inspection. Do not overload extension cords.
  • Don’t mount lights in any way that can damage the cord’s wire insulation.  To hold lights in place, string them through hooks or insulated staples–don’t use nails or tacks. Never pull or tug lights to remove them.
  • Keep children and pets away from light strings and electrical decorations.
  • Never use electric lights on a metallic tree. The tree can become charged with electricity from faulty lights, and a person touching a branch could be electrocuted.
  • Before using lights outdoors, check labels to be sure they have been certified for outdoor use.
  • Make sure all the bulbs work and that there are no frayed wires, broken sockets or loose connections.
  • Plug all outdoor electric decorations into circuits with ground-fault circuit interrupters to avoid potential shocks.
  • Turn off all lights when you go to bed or leave the house. The lights could short out and start a fire.
Decorations
  • Use only non-combustible and flame-resistant materials to trim a tree. Choose tinsel and artificial icicles of plastic and non-leaded metals.
  • Never use lighted candles on a tree or near other evergreens. Always use non-flammable holders, and place candles where they will not be knocked down.
  • In homes with small children, take special care to avoid decorations that are sharp and breakable, and keep trimmings with small removable parts out of the reach of children.
  • Avoid trimmings that resemble candy and food that may tempt a young child to put them in his mouth.
Holiday Home Safety Entertaining
  • Unattended cooking is the leading cause of home fires in the U.S.  When cooking for holiday visitors, remember to keep an eye on the range.
  • Provide plenty of large, deep ashtrays, and check them frequently. Cigarette butts can smolder in the trash and cause a fire, so completely douse cigarette butts with water before discarding.
  • Keep matches and lighters up high, out of sight and reach of children (preferably in a locked cabinet).
  • Test your smoke alarms, and let guests know what your fire escape plan is.

    Trees
  • When purchasing an artificial tree, look for the label “fire-resistant.”
  • When purchasing a live tree, check for freshness. A fresh tree is green, needles are hard to pull from branches, and when bent between your fingers, needles do not break.
  • When setting up a tree at home, place it away from fireplaces, radiators and portable heaters. Place the tree out of the way of traffic and do not block doorways.
  • Cut a few inches off the trunk of your tree to expose the fresh wood. This allows for better water absorption and will help to keep your tree from drying out and becoming a fire hazard.
  • Be sure to keep the stand filled with water, because heated rooms can dry live trees out rapidly.
  • Make sure the base is steady so the tree won’t tip over easily.

    Fireplaces
  • Before lighting any fire, remove all greens, boughs, papers and other decorations from fireplace area. Check to see that the flue is open.
  • Use care with “fire salts,” which produce colored flames when thrown on wood fires. They contain heavy metals that can cause intense gastrointestinal irritation and vomiting if eaten.
  • Do not burn wrapping papers in the fireplace. A flash fire may result as wrappings ignite suddenly and burn intensely.

    Toys and Ornaments
  • Purchase appropriate toys for the appropriate age. Some toys designed for older children might be dangerous for younger children.
  • Electric toys should be UL/FM approved.
  • Toys with sharp points, sharp edges, strings, cords, and parts small enough to be swallowed should not be given to small children.
  • Place older ornaments and decorations that might be painted with lead paint out of the reach of small children and pets.

Children and Pets 
  • Poinsettias are known to be poisonous to humans and animals, so keep them well out of reach, or avoid having them.
  • Keep decorations at least 6 inches above the child’s reach.
  • Avoid using tinsel. It can fall on the floor and a curious child or pet may eat it. This can cause anything from mild distress to death.
  • Keep any ribbons on gifts and tree ornaments shorter than 7 inches. A child could wrap a longer strand of ribbon around their neck and choke.
  • Avoid mittens with strings for children. The string can get tangled around the child’s neck and cause them to choke. It is easier to replace a mitten than a child.
  • Watch children and pets around space heaters or the fireplace. Do not leave a child or pet unattended.
  • Store scissors and any sharp objects that you use to wrap presents out of your child’s reach.
  • Inspect wrapped gifts for small decorations, such as candy canes, gingerbread men, and mistletoe berries, all of which are choking hazards.
Security
  • Use your home burglar alarm system.
  • If you plan to travel for the holidays, don’t discuss your plans with strangers.
  • Have a trusted friend or neighbor to keep an eye on your home.
  • Educate other members of the family on holiday home safety to ensure everyone is on the same page.
NXTMOVE INSPECTIONS WISHES YOU
A SAFE & JOYOUS HOLIDAY SEASON!

Ground-Fault Circuit Interrupters (GFCIs)

What is a GFCI?

A ground-fault circuit interrupter, or GFCI, is a device used in electrical wiring to disconnect a circuit when unbalanced current is detected between an energized conductor and a neutral return conductor.  Such an imbalance is sometimes caused by current “leaking” through a person who is simultaneously in contact with a ground and an energized part of the circuit, which could result in lethal shock.  GFCIs are designed to provide protection in such a situation, unlike standard circuit breakers, which guard against overloads, short circuits and ground faults.
It is estimated that about 300 deaths by electrocution occur every year, so the use of GFCIs has been adopted in new construction, and recommended as an upgrade in older construction, in order to mitigate the possibility of injury or fatality from electric shock.

History

The first high-sensitivity system for detecting current leaking to ground was developed by Henri Rubin in 1955 for use in South African mines.  This cold-cathode system had a tripping sensitivity of 250 mA (milliamperes), and was soon followed by an upgraded design that allowed for adjustable trip-sensitivity from 12.5 to 17.5 mA.  The extremely rapid tripping after earth leakage-detection caused the circuit to de-energize before electric shock could drive a person’s heart into ventricular fibrillation, which is usually the specific cause of death attributed to electric shock.

Charles Dalziel first developed a transistorized version of the ground-fault circuit interrupter in 1961.  Through the 1970s, most GFCIs were of the circuit-breaker type.  This version of the GFCI was prone to frequent false trips due to poor alternating-current characteristics of 120-volt insulations.  Especially in circuits with long cable runs, current leaking along the conductors’ insulation could be high enough that breakers tended to trip at the slightest imbalance.
Since the early 1980s, ground-fault circuit interrupters have been built into outlet receptacles, and advances in design in both receptacle and breaker types have improved reliability while reducing instances of “false trips,” known as nuisance-tripping.

NEC Requirements for GFCIs

The National Electrical Code (NEC) has included recommendations and requirements for GFCIs in some form since 1968, when it first allowed for GFCIs as a method of protection for underwater swimming pool lights.  Throughout the 1970s, GFCI installation requirements were gradually added for 120-volt receptacles in areas prone to possible water contact, including bathrooms, garages, and any receptacles located outdoors.

The 1980s saw additional requirements implemented.  During this period, kitchens and basements were added as areas that were required to have GFCIs, as well as boat houses, commercial garages, and indoor pools and spas.  New requirements during the ’90s included crawlspaces, wet bars and rooftops.  Elevator machine rooms, car tops and pits were also included at this time.  In 1996, GFCIs were mandated for all temporary wiring for construction, remodeling, maintenance, repair, demolition and similar activities and, in 1999, the NEC extended GFCI requirements to carnivals, circuses and fairs.

The 2008 NEC contains additional updates relevant to GFCI use, as well as some exceptions for certain areas.  The 2008 language is presented here for reference.

2008 NEC on GFCIs

100.1 Definition

100.1  Definitions. Ground-Fault Circuit Interrupter. A device intended for the protection of personnel that functions to de-energize a circuit or portion thereof within an established period of time when a current to ground exceeds the values established for a Class A device.

FPN: Class A ground-fault circuit interrupters trip when the current to ground has a value in the range of 4 mA to 6 mA.  For further information, see UL 943, standard for Ground-Fault Circuit Interrupters.

210.8(A)&(B)  Protection for Personnel

210.8 Ground-Fault Circuit Interrupter Protection for Personnel.

(A)  Dwelling Units. All 125-volt, single-phase, 15- and 20-ampere receptacles installed in the locations specified in (1) through (8) shall have ground-fault circuit-interrupter protection for personnel.

(1)   bathrooms;

(2)   garages, and also accessory buildings that have a floor located at or below grade level not intended as habitable rooms and limited to storage areas, work areas, and areas of similar use;

Exception No. 1: Receptacles not readily accessible.

Exception No. 2: A single receptacle or a duplex receptacle for two appliances that, in normal use, is not easily moved from one place to another and that is cord-and-plug connected in accordance with 400.7(A)(6), (A)(7), or (A)(8).

Receptacles installed under the exceptions to 210.8(A)(2) shall not be considered as meeting the requirements of 210.52(G)

(3)   outdoors;

Exception: Receptacles that are not readily accessible and are supplied by a dedicated branch circuit for electric snow melting or deicing equipment shall be permitted to be installed in accordance with the applicable provisions of Article 426.

(4)   crawlspaces at or below grade level.

Exception No. 1: Receptacles that are not readily accessible.

Exception No. 2:  A single receptacle or a duplex receptacle for two appliances that, in normal use, is not easily moved from one place to another and that is cord-and-plug connected in accordance with 400.7(A)(6), (A)(7), or (A)(8).

Exception No. 3: A receptacle supplying only a permanently installed fire alarm or burglar alarm system shall not be required to have ground-fault circuit interrupter protection.

Receptacles installed under the exceptions to 210.8(A)(2) shall not be considered as meeting the requirements of 210.52(G)

(6)   kitchens, where the receptacles are installed to serve the countertop surfaces;

(7)   wet bar sinks, where the receptacles are installed to serve the countertop surfaces and are located within 6 feet (1.8 m) of the outside edge of the wet bar sink;

(8)   boathouses;

(B) Other Than Dwelling Units. All 125-volt, single-phase, 15- and 20-ampere receptacles Installed in the locations specified in (1), (2), and (3) shall have ground-fault circuit interrupter protection for personnel:

(1)   bathrooms;

(2)   rooftops;

Exception: Receptacles that are not readily accessible and are supplied by a dedicated branch circuit for electric snow-melting or de-icing equipment shall be permitted to be installed in accordance with the applicable provisions of Article 426.

(3)   kitchens.

Testing Receptacle-Type GFCIs

Receptacle-type GFCIs are currently designed to allow for safe and easy testing that can be performed without any professional or technical knowledge of electricity.  GFCIs should be tested right after installation to make sure they are working properly and protecting the circuit.  They should also be tested once a month to make sure they are working properly and are providing protection from fatal shock.
To test the receptacle GFCI, first plug a nightlight or lamp into the outlet. The light should be on.  Then press the “TEST” button on the GFCI. The “RESET” button should pop out, and the light should turn off.
If the “RESET” button pops out but the light does not turn off, the GFCI has been improperly wired. Contact an electrician to correct the wiring errors.

If the “RESET” button does not pop out, the GFCI is defective and should be replaced.

If the GFCI is functioning properly and the lamp turns off, press the “RESET” button to restore power to the outlet.